Happy fellow developers, I hope you are well out there. The Eurovision song contest just ended and the question is, did the right country win? Lithuania(The Roop) and Ukraine(Go_A) were my favourites 😉
And for you that have no idea what Eurovision song contest is, here is a must see movie – Eurovision Song Contest: The Story of Fire Saga 😆
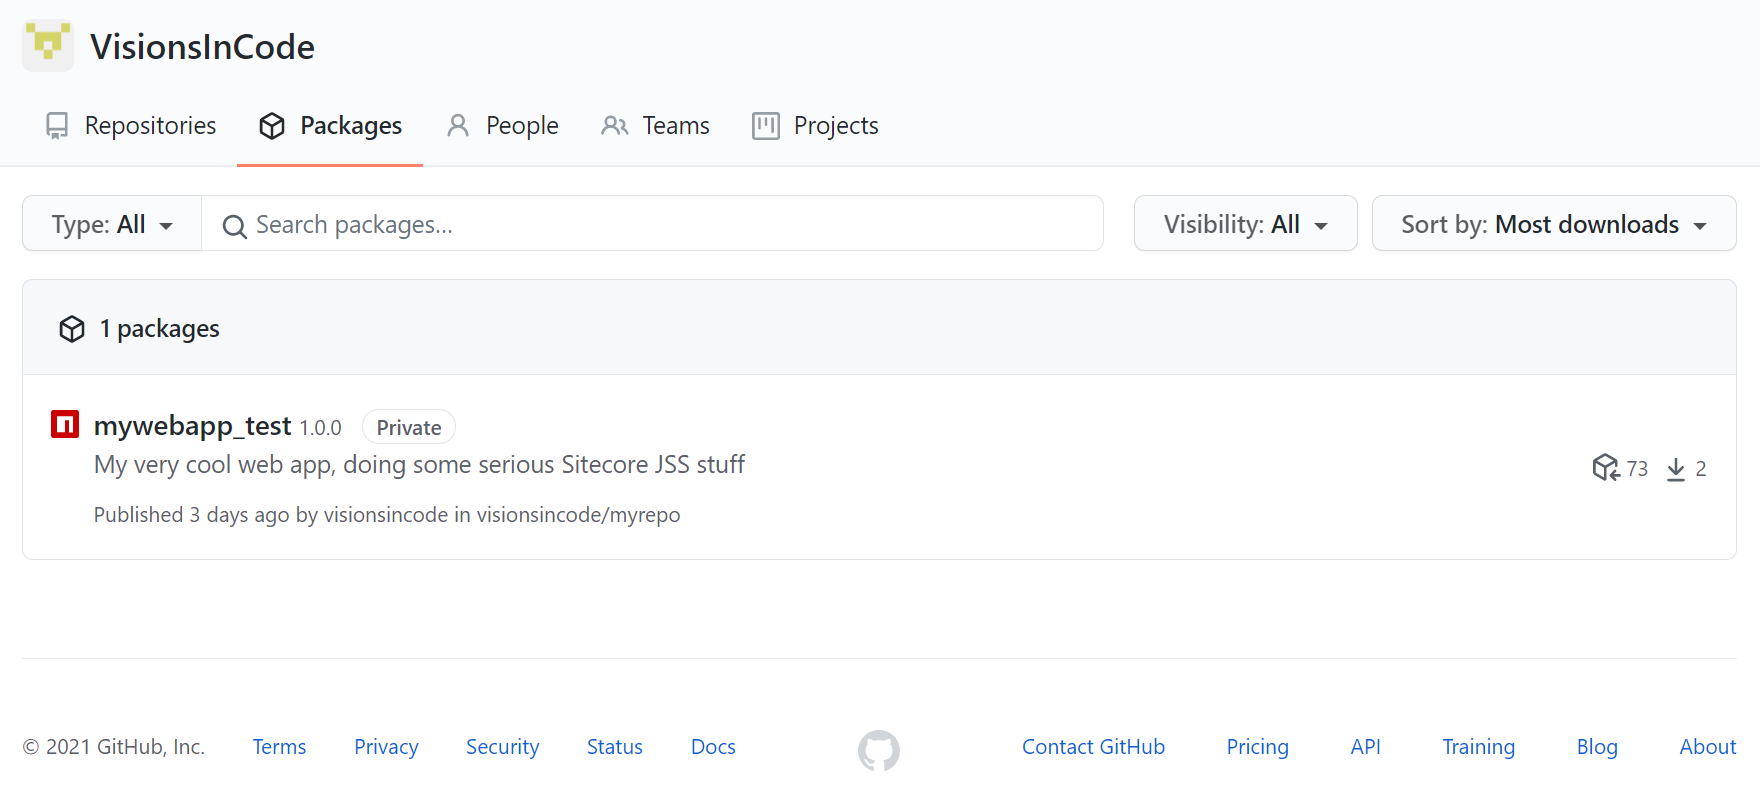
Today’s post will be a continuation of the previous post – Build and publish your Sitecore JSS dist as an NPM package to GitHub Packages – Part 1
In the previous post we built an npm dist package and pushed it to the GitHub Packages, in this post we will use the npm dist package and build a Sitecore JSS Proxy image and push it to GitHub Packages. (Yes, GitHub Packages can store all kinds of types, great stuff indeed). I can also mention that the build and the push of the image will be done in another repository, we will of course use GitHub Actions – Goodbye Azure Devops Pipelines and Hello GitHub Actions 😁
The setup is like this, we have two repositories:
One FE repository, here we have all the wonderful Sitecore JSS and React stuff.
The other repository contains the typical Sitecore (backend) stuff, a good old Helix solution with many lovely projects, yes I’m a fan of many projects. I believe in the Single-responsibility principle per project.
The idea is this, whenever there is a push to the test branch in the FE repo we want to trigger a build in the Sitecore Helix repo, which will build and push a Sitecore JSS Proxy image to a docker registry(GitHub Packages or Azure).
First up is to add the triggering part to the workflow(the one we’ve created in the previous post) in the FE repository. Here is the updated workflow:
name: Build and push dist packages for my website

on:
  push:
    branches: [ test ]

  workflow_dispatch:

jobs:
  build-images:
      runs-on: ubuntu-latest

      env:
        TOKEN: ${{secrets.GITHUB_TOKEN}}
        CI: true

      steps:
      - name: Checkout my code
        uses: actions/checkout@v2

      - name: Create scjssconfig.json
        id: create-json
        uses: jsdaniell/create-json@1.1.2
        with:
          name: "scjssconfig.json"
          json: '{"sitecore":{"apiKey":"API-KEY-JSS-APP}", "layoutServiceHost":"https://mywebsite-test.sandbox.se", "graphQLApiHost":"http://mywebsite-test.sandbox.se"}}'

      - name: Change name in package.json
        run: echo "`jq '.name="@myorganization/mywebapp_test"' package.json`" > package.json
      - name: read package.json
        run: cat package.json

      - name: Update version package.json
        run: echo "`jq '.version="${{ github.run_number }}.0.0"' package.json`" > package.json
      - name: read package.json
        run: cat package.json

      - name: Build and push npm package to Github Packages
        run: |
          npm config set //npm.pkg.github.com/:_authToken $TOKEN
          npm install
          npm i -l @sitecore-jss/sitecore-jss@15.0.1
          npm run jss build
          npm publish

      - name: Trigger workflow in repo MyHelixRepoWithManyLovelyProjects
        run: |
          curl -H "Authorization: token ${{secrets.REPO_PAT}}" \
          -H 'Accept: application/vnd.github.everest-preview+json' \
          "https://api.github.com/repos/YOUR-ORGANIZATION/MyHelixRepoWithManyLovelyProjects/dispatches" \
          -d '{"event_type": "just_published_mywebsite_test_package", "client_payload": {"repository": "${{ github.GITHUB_REPOSITORY }}"}}'
Notice the last part, Trigger workflow in repo MyHelixRepoWithManyLovelyProjects. It uses dispatches to trigger an event on another repository by calling the URL, https://api.github.com/repos/YOUR-ORGANIZATION/MyHelixRepoWithManyLovelyProjects/dispatches
So what are dispatches?
You can manually trigger workflow runs. To trigger specific workflows in a repository, use the
https://docs.github.com/en/actions/reference/events-that-trigger-workflows#manual-eventsworkflow_dispatchevent. To trigger more than one workflow in a repository and create custom events and event types, use therepository_dispatchevent.
The very important custom event type – just_published_mywebsite_test_package.
And (I almost forgot) you will also have to create a Personal Access Token – secrets.REPO_PAT
Great, the first part is done. Let’s continue with the other repository – MyHelixRepoWithManyLovelyProjects.
In the Sitecore Helix repo we will add a new workflow, it’s important that the workflow must lie in the main/master branch. The workflow will build and push a Sitecore JSS Proxy image. Here is the workflow and notice that it listens to the dispatch event – repository_dispatch:
name: Build and push JSS Proxy image, listens to dispatch events from repo myjssrepo - ltsc2019

on: [repository_dispatch]

jobs:
  build-push-image:
      name: Build and push jssproxy image
      runs-on: windows-2019

      steps:
      - name: Log into GitHub Packages Docker registry
        run: echo "${{ secrets.GITHUB_TOKEN }}" | docker login ghcr.io -u ${{ github.actor }} --password-stdin

      - name: Checkout
        uses: actions/checkout@v2

      - name: Event Information
        run: echo "Event '${{ github.event.action }}' received from '${{ github.event.client_payload.repository }}'"

      - name: Build the JSS Proxy Test Image
        if: github.event.action == 'just_published_mywebsite_test_package'
        env:
          REGISTRY : ghcr.io/YOURORGANIZATION/
          COMPOSE_PROJECT_NAME : somename
          VERSION : test-${{ github.run_number }}
          OS_IMAGE_TAG : ltsc2019
        run: docker-compose -f docker-compose.proxy.mywebsite.test.build.yml build --no-cache

      - name: Build the JSS Proxy Prod Image
        if: github.event.action == 'just_published_mywebsite_prod_package'
        env:
          REGISTRY : ghcr.io/YOURORGANIZATION/
          COMPOSE_PROJECT_NAME : somename
          VERSION : prod-${{ github.run_number }}
          OS_IMAGE_TAG : ltsc2019
        run: docker-compose -f docker-compose.proxy.mywebsite.prod.build.yml build --no-cache


      - name: List images
        run: docker images

      - name: Push JSS proxy TEST image
        if: github.event.action == 'just_published_mywebsite_test_package'
        run: |
          echo "Event just_published_mywebsite_test_package was received"
          docker push ghcr.io/YOURORGANIZATION/somename-jssproxy-mywebsite-ltsc2019:test-${{ github.run_number }}

      - name: Push JSS proxy PROD image
        if: github.event.action == 'just_published_mywebsite_prod_package'
        run: |
          echo "Event just_published_mywebsite_prod_package was received"
          docker push ghcr.io/YOURORGANIZATION/somename-jssproxy-mywebsite-ltsc2019:prod-${{ github.run_number }}
Let me break it down for you 🙂
It will execute every time when the dispatch event, repository_dispatch, is triggered:
on: [repository_dispatch]
Tell the workflow, what it should run on/in
runs-on: windows-2019
Login to GitHub Packages Docker registry or login to an Azure Registry
- name: Log into GitHub Packages Docker registry
  run: echo "${{ secrets.GITHUB_TOKEN }}" | docker login ghcr.io -u ${{ github.actor }} --password-stdin

- name: Log into azure registry
  run: echo "${{ secrets.ACR_PWD }}" | docker login myregistryname.azurecr.io -u ${{ secrets.ACR_USERNAME }} --password-stdin
Check out the repo
- name: Checkout
  uses: actions/checkout@v2
This is optional, showing what event has been triggered:
- name: Event Information
  run: echo "Event '${{ github.event.action }}' received from '${{ github.event.client_payload.repository }}'"
Here it will build the JSS Proxy image. Notice the if statement, it will only build if the custom event type is just_published_mywebsite_test_package
- name: Build the JSS Proxy Test Image
  if: github.event.action == 'just_published_mywebsite_test_package'
  env:
    REGISTRY : ghcr.io/YOURORGANIZATION/
    COMPOSE_PROJECT_NAME : somename
    VERSION : test-${{ github.run_number }}
    OS_IMAGE_TAG : ltsc2019
  run: docker-compose -f docker-compose.proxy.mywebsite.test.build.yml build --no-cache
You can easily add a second step that will only accept just_published_mywebsite_prod_package – The power of GitHub Actions 😎
- name: Build the JSS Proxy Prod Image
  if: github.event.action == 'just_published_mywebsite_prod_package'
  env:
    REGISTRY : ghcr.io/YOURORGANIZATION/
    COMPOSE_PROJECT_NAME : somename
    VERSION : prod-${{ github.run_number }}
    OS_IMAGE_TAG : ltsc2019
  run: docker-compose -f docker-compose.proxy.mywebsite.prod.build.yml build --no-cache
This is optional, list the images. It’s always good to give extra information to the logs:
- name: List images
  run: docker images
The final part, pushing the image to the registry. Notice the github.run_number, a nice way to tag and “versioning” your images. The push will only be executed if the custom event type is just_published_mywebsite_test_package
- name: Push JSS proxy TEST image
  if: github.event.action == 'just_published_mywebsite_test_package'
  run: |
    echo "Event just_published_mywebsite_test_package was received"
    docker push ghcr.io/YOURORGANIZATION/somename-jssproxy-mywebsite-ltsc2019:test-${{ github.run_number }}
And you can easily add a second step that will only accept just_published_mywebsite_prod_package – The power of GitHub Actions 😎
- name: Push JSS proxy PROD image
  if: github.event.action == 'just_published_mywebsite_prod_package'
  run: |
    echo "Event just_published_mywebsite_prod_package was received"
    docker push ghcr.io/YOURORGANIZATION/somename-jssproxy-mywebsite-ltsc2019:prod-${{ github.run_number }}
But wait a minute, I almost forgot… Let me show you how the JSS Proxy image is built. Let’s dive into the rabbit hole 😀
First out is the docker-compose.proxy.mywebsite.test.build.yml file:
version: "3.7"
services:

  jssproxy-shopsite:
    image: ${REGISTRY}${COMPOSE_PROJECT_NAME}-jssproxy-mywebsite-${OS_IMAGE_TAG}:${VERSION:-latest}
    build:
        context: ./docker/build/jssproxy/mywebsite/test
Notice the test directory, it will contain a Dockerfile and the folders which are needed for building the JSS Proxy image:
The node-headless-ssr-proxy folder is from the sitecore sample repo, node-headless-ssr-proxy 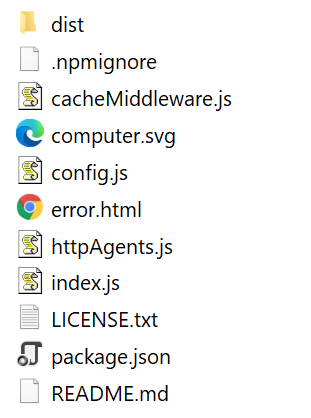
* dist will contain an (empty) MyWebsite folder
The workfolder is needed when installing the npm dist package, it contains the following files:
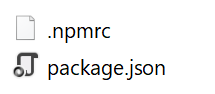
The package.json file, notice the name.
{
  "name": "@YOURORGANIZATION/mywebapp",
  "version": "1.0.0",
  "author": "An Author"
}
And the .npmrc file. Telling where the “npm” lies and the authentication to the GitHub Packages (npm) registry
@YOURORGANIZATION:registry=https://npm.pkg.github.com
//npm.pkg.github.com/:_authToken=ghp_xxx_yyy_xxxx
*ghp_xxx_yyy_xxxx is the “secrets.GITHUB_TOKEN”
And finally the Dockerfile:
FROM stefanscherer/node-windows:10.16.3-nanoserver as build

WORKDIR /jss
COPY ./node-headless-ssr-proxy /jss

WORKDIR /mybuild
COPY ./workfolder /mybuild

RUN npm install @YOURORGANIZATION/mywebapp_test --no-optional

WORKDIR /mybuild/node_modules/@YOURORGANIZATION/mywebapp_test/build
RUN xcopy * C:\jss\dist\MyWebsite /s

WORKDIR /jss

RUN npm install

CMD [ "node", "index.js" ]
Let me give you a quick explanation of the Dockerfile:
1. First, we grab the stefanscherer node windows image.
2. Create the jss directory and copy the node-headless-ssr-proxy folder.
3. Create mybuild directory and copy the workfolder.
4. Install the npm dist package(we’ve created in previous post) in the mybuild directory.
5. Copy build content from the node module into the JSS directory.
6. And finally, run an npm install in the JSS directory.
And we have a newly built JSS Proxy image 😀
I really like this approach and most of all I like GitHub more and more. Now with GitHub Actions and GitHub Packages, the CI/CD experience is now coupled to the code(if you have your code in GitHub). I love it!
That’s all for now folks 😀
