Friends of Sitecore, Easter is upon us (here in Sweden, at least), and I’m egg-cited to share some valuable insights with you all! 🐰 May the Easter bunny bring you plenty of eggs and joy.
In today’s post, we’ll hop into how you can set up an authentication flow in your Sitecore site using Auth0 with NextJs. Let’s crack into it!
The scenario is this: Certain pages are accessible only to logged-in users. When attempting to visit such a page, users are redirected to a login page. Following a successful login, users are then automatically redirected back to the originally requested page, now with the necessary permissions to view it.
So how do we do this?
In order to login, we need some kind of authentication mechanism.
While it might seem convenient to use Sitecore’s own user management for this purpose, it’s best to reserve that exclusively for editors.
If you have the resources, developing your own external ‘users service’ or a SaaS solution could be an option.
However, for many, turning to a third-party authentication provider is the most practical choice, and the market is full of reputable options. I recommend considering Auth0 (Okta), a well-known and reliable authentication provider that even Sitecore uses. Notably, Okta offers a free developer account, which is particularly useful when you’re working on your proof of concept (POC).
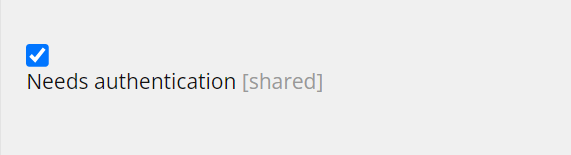
In Sitecore, we need a way to identify which pages require authentication. To achieve this, we’ll introduce a flag(checkbox) on each page to indicate whether it’s a restricted page that necessitates user authentication. Additionally, we’ll configure a dedicated login page. Users attempting to access any restricted page will be automatically redirected to this login page, where they can authenticate themselves before gaining access to the desired content.
In the frontend of our Next.js app, we will integrate Auth0 authentication using NextAuth.js. NextAuth.js is an open-source authentication solution specifically designed for Next.js applications. It’s built to fully support Next.js and serverless architectures, providing a comprehensive and seamless authentication experience.
Fantastic, now that we’ve established the requirements, let’s start 🙂
In Sitecore, we want to add a checkbox to the template, which is inherited on each page. It would be best to place it near the “menu settings” such as “Hide in menu.”. Something like this
We also need to setup a login page.

*The rendering for the login page will have the Component Name: LoginForm
It’s time to set up our authentication app in Okta (Auth0). After creating a free account, let’s go to the Applications in Okta and create our app 🙂

Here is a helpful tutorial on how to make an app : Register Regular Web Applications

It’s time to have some fun with NextJs!
To get Auth0 to work well with NextJs, we will use NextAuth.js. Let’s install it.
npm install next-auth
Before we get started, I want to give a big shout out to Thomas Desmond. I’ve read numerous blog posts, but the one that really made a difference for me was Thomas Desmond’s article on adding authentication to Next.js with NextAuth.js and Okta. You can read it on his website here.
So basically I followed his blogpost, adding the “env keys” and using the SessionProvider. For the authentication Thomas mentions the Client Side Authentication or the Server Side Authentication. For me it was very clear, always use Server Side. That’s the beauty of NextJs you have both client and server side, extremely powerful 🙂
Important note: We don’t want to use the global login, we want to remain on the website and use our own login page.
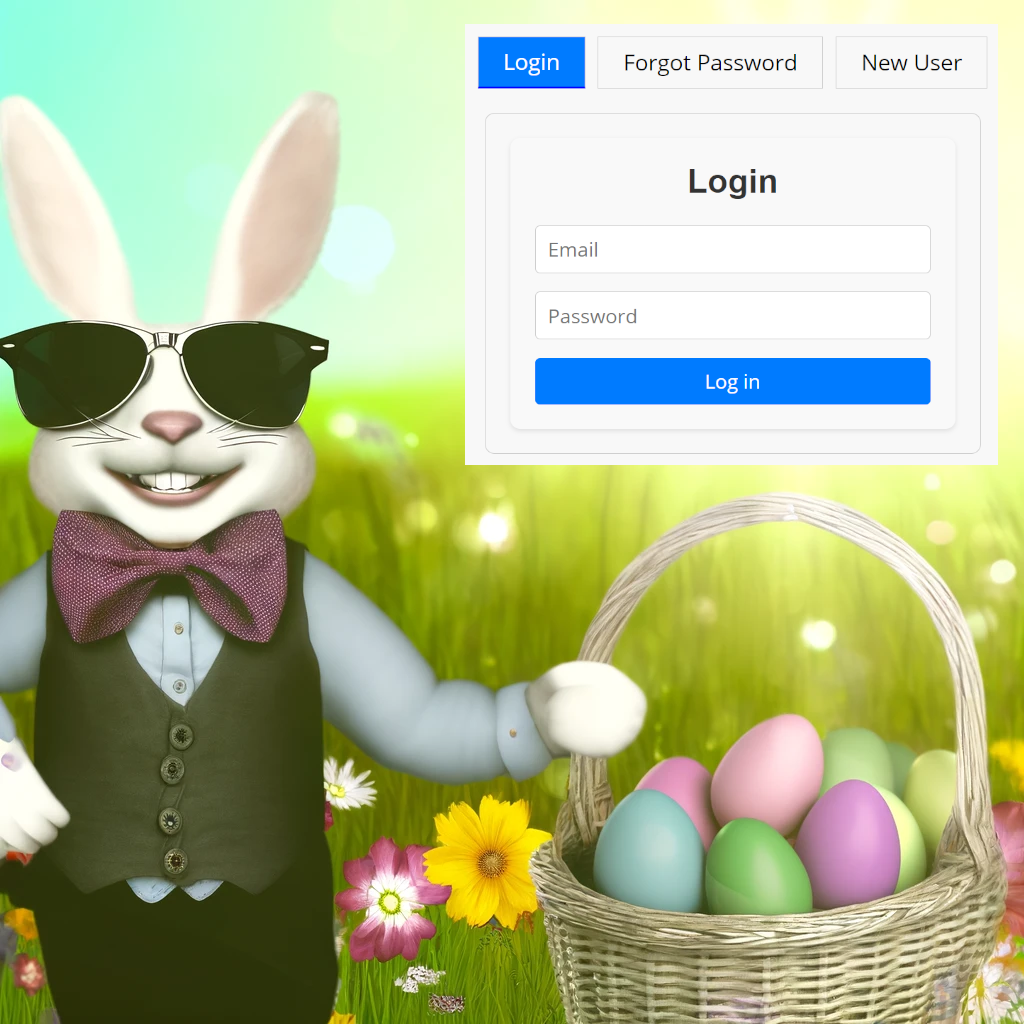
Remember how we set up a login page in Sitecore using the LoginForm rendering? Now, let’s dive into how the LoginForm is implemented within our Next.js application. This will give us a closer look at how the login process is facilitated on the frontend.
Here is the code for LoginForm.
import { signIn } from 'next-auth/react';
import router from 'next/router';
import styles from './styles.module.scss';
import { SetStateAction, useEffect, useState } from 'react';


const LoginForm = ({ callbackUrl }: { callbackUrl: string }) => {

  const [activeTab, setActiveTab] = useState('login');
  const [errorMessage, setErrorMessage] = useState('');
  const [successMessage, setSuccessMessage] = useState('');

  const handleTabClick = (tab: SetStateAction<string>) => {
      setActiveTab(tab);
      setErrorMessage(''); // Clear error message when switching tabs
  };


  const handleLoginSubmit = async (event: {
    preventDefault: () => void;
    currentTarget: HTMLFormElement | undefined;
  }) => {
    event.preventDefault();
    setErrorMessage('');
    setSuccessMessage('');


    const formData = new FormData(event.currentTarget);
    const email = formData.get('email');
    const password = formData.get('password');
    const { returnUrl } = router.query;
    callbackUrl = callbackUrl || '/';

    // Sign in using NextAuth.js credentials provider
    const result = await signIn('credentials', {
      redirect: false, // Set to true if you want to redirect the user to another page upon success
      email: email,
      password: password,
    });


    if (!result?.error) {
      // Handle success, e.g., by redirecting the user or updating UI state
      window.location.href = returnUrl ? returnUrl.toString() : callbackUrl;
    } else {
      if (result?.error.includes("AuctionUser role")) {
        setErrorMessage("Access denied. You need to be approved.");
      } else {
        setErrorMessage(result?.error);
        // Handle other errors or set a generic error message
        //setErrorMessage("Login failed. Please try again.");
      }
      // Handle errors, e.g., by showing an error message
      console.error(result?.error);
    }
  };

  const handleRegisterSubmit = async (event: {
    preventDefault: () => void;
    currentTarget: HTMLFormElement | undefined;
  }) => {
    event.preventDefault();
     // Clear previous messages
    setErrorMessage('');
    setSuccessMessage('');

    // Registration logic here
    const formData = new FormData(event.currentTarget);
    const email = formData.get('registrationEmail') as string;
    const username = formData.get('registrationEmail') as string;
    const password = formData.get('registrationPassword') as string;
    const name = formData.get('registrationName') as string; // Assuming you have a name field

    try {
      const res = await fetch('/api/auth/signup', {
        method: 'POST',
        headers: {
          'Content-Type': 'application/json',
        },
        body: JSON.stringify({
          email,
          username,
          password,
          name,
        }),
      });

      if (!res.ok) {
        // Extract error message from response if available
        const errorData = await res.json();
        const errorMessage = errorData.message || 'Registration failed';
        throw new Error(errorMessage);
      }

      // If registration was successful
      setSuccessMessage('Registration successful. Please check your email to verify your account');
      // Optionally reset form or redirect user
      // event.currentTarget.reset();
      // router.push('/login'); // Redirect to login page or any other page

    } catch (error) {
      console.error('Registration error:', error);
      setErrorMessage(error.message);
    }
  };


  const handleForgotPasswordSubmit = async (event: { preventDefault: () => void; currentTarget: HTMLFormElement | undefined; }) => {
    event.preventDefault();
    const formData = new FormData(event.currentTarget);
    const email = formData.get('email');

    // Assuming you have an API endpoint or NextAuth.js method to handle password reset
    try {
      const res = await fetch('/api/auth/changePassword', {
        method: 'POST',
        headers: {
          'Content-Type': 'application/json',
        },
        body: JSON.stringify({
          email
        }),
      });

      if (!res.ok) {
        throw new Error(res.errors);
      }

      setActiveTab('login');
      setErrorMessage(''); // Clear any existing error messages
      setSuccessMessage('Password reset email sent successfully. Please check your email.');
      setTimeout(() => {
        setSuccessMessage(''); // Optionally clear the success message after some time
      }, 5000); // 5000 milliseconds = 5 seconds

      console.log('Sending password reset email to:', email);
      // Reset form or show a success message
    } catch (error) {
      console.error('Password reset error:', error);
      setErrorMessage('Failed to send password reset email. Please try again.');
    }
  };


  useEffect(() => {
    if (activeTab === 'register') {
      // Define the fields
      const passwordField = document.getElementById('registrationPassword') as HTMLInputElement;
      const emailField = document.getElementById('registrationEmail') as HTMLInputElement;
      const nameField = document.getElementById('registrationName') as HTMLInputElement;

      // Password validation listener
      const passwordListener = function(this: HTMLInputElement) {
        const passwordRegex = /^(?=.*\d)(?=.*[a-z])(?=.*[A-Z]).{8,}$/;
        if (!passwordRegex.test(this.value)) {
          this.setCustomValidity("Password must include at least 8 characters, a number, a lowercase letter, and an uppercase letter.");
        } else {
          this.setCustomValidity("");
        }
      };

      // Name validation listener
      const nameListener = function(this: HTMLInputElement) {
        const names = this.value.split(' ');
        if (names.length < 2 || names.some(name => name.length === 0)) {
          this.setCustomValidity("Please enter both first and last name.");
        } else {
          this.setCustomValidity("");
        }
      };

      // Email validation listener
      const emailListener = function(this: HTMLInputElement) {
        const emailRegex = /^[^\s@]+@[^\s@]+\.[^\s@]+$/;
        if (!emailRegex.test(this.value)) {
          this.setCustomValidity("Please enter a valid email address.");
        } else {
          this.setCustomValidity("");
        }
      };

      passwordField?.addEventListener('input', passwordListener);
      nameField?.addEventListener('input', nameListener);
      emailField?.addEventListener('input', emailListener);

      // Cleanup the event listeners when the component unmounts or the active tab changes
      return () => {
        passwordField?.removeEventListener('input', passwordListener);
        nameField?.removeEventListener('input', nameListener);
        emailField?.removeEventListener('input', emailListener);
      };
    }
  }, [activeTab]);


  return (
    <div className={styles.authContainer}>
    <div className={styles.tabs}>
    <button
    className={`${styles.tabButton} ${activeTab === 'login' ? styles.active : ''}`}
    onClick={() => handleTabClick('login')}
    >
        Login
    </button>
    <button
        className={`${styles.tabButton} ${activeTab === 'forgotPassword' ? styles.active : ''}`}
        onClick={() => handleTabClick('forgotPassword')}
    >
      Forgot Password
    </button>
    <button
        className={`${styles.tabButton} ${activeTab === 'register' ? styles.active : ''}`}
        onClick={() => handleTabClick('register')}
    >
        New User
    </button>
    </div>

      {/* Display error message if present */}
      {errorMessage && <div className={styles.errorMessage}>{errorMessage}</div>}
      {/* Display success message if present */}
      {successMessage && <div className={styles.successMessage}>{successMessage}</div>}
      {activeTab === 'login' && (
         <div className={styles.generalForm}>
          <form className={styles.form} onSubmit={handleLoginSubmit}>
            <h2 className={styles.title}>Login</h2>
            <input className={styles.input} name="email" type="email" placeholder="Email" required />
            <input className={styles.input} name="password" type="password" placeholder="Password" required />
            <button className={styles.button} type="submit">Log in</button>
          </form>
        </div>
      )}
      {activeTab === 'forgotPassword' && (
        <div className={styles.generalForm}>
          <form className={styles.form} onSubmit={handleForgotPasswordSubmit}>
            <h2 className={styles.title}>Forgot Password</h2>
            <input className={styles.input} name="email" type="email" placeholder="Enter your email" required />
            <button className={styles.button} type="submit">Send Reset Link</button>
          </form>
        </div>
      )}
      {activeTab === 'register' && (
        <div className={styles.generalForm}>
          <form className={styles.form} onSubmit={handleRegisterSubmit}>
            <h2 className={styles.title}>Register</h2>
            <input
              id="registrationEmail"
              className={styles.input}
              name="registrationEmail"
              type="input"
              placeholder="Email"
              title="Email must be valid."
              required
            />
            <input
              className={styles.input}
              id="registrationPassword"
              name="registrationPassword"
              type="password"
              placeholder="Password"
              pattern="(?=.*\d)(?=.*[a-z])(?=.*[A-Z]).{8,}"
              title="Password must include at least 8 characters, a number, a lowercase letter, and an uppercase letter."
              required
            />
            <input
              id="registrationName"
              className={styles.input}
              name="registrationName"
              type="text"
              placeholder="First and Last Name"
              pattern="^\S+\s+\S+.*" // Regex to enforce at least two words
              title="Please enter both first and last name."
              required
            />
            <button className={styles.button} type="submit">Register</button>

          </form>
        </div>
      )}
    </div>
  );
};

export default LoginForm;
Let’s summarize the functionality of our LoginForm component 🙂
State Management
- Manages the current active tab (
login,register,forgotPassword) and messages (errorMessage,successMessage) to provide feedback to the user.
Tab Handling
handleTabClick: Switches between different form views (login, forgot password, registration) and clears any existing messages.
Form Submission Handlers
handleLoginSubmit: Authenticates users using their email and password. On success, redirects to a specified URL; on failure, displays an error message.handleRegisterSubmit: Registers a new user with provided details (email, username, password, name). On successful registration, displays a success message; on failure, shows an error.handleForgotPasswordSubmit: Requests a password reset for the provided email. Shows a success message on successful request; otherwise, displays an error.
Form Validation
- Implemented within the
useEffecthook for the registration form, ensuring the password meets certain criteria, the name field includes both first and last names, and the email is valid.
UI Rendering
- Dynamically renders the appropriate form based on the active tab, displaying either the login, registration, forgot password form, or the login with BankID option.
- Displays error or success messages based on the state.
Custom Input Validation
- On the registration form, custom validation is applied to the password, name, and email fields to ensure they meet specific requirements. This validation is set up in the
useEffecthook when the register tab is active and cleaned up when the component unmounts or the active tab changes.
*In this post we will focus on the login part only.
Wonderful! It’s time to add the authentication, navigate to pages/api and create ts file – […nextauth].ts
Let me show you the code 🙂
import NextAuth, { Session } from 'next-auth';
import { JWT } from 'next-auth/jwt';
import CredentialsProvider from 'next-auth/providers/credentials';

// Extend the User type
type ExtendedUser = {
  name?: string | null;
  email?: string | null;
  image?: string | null;
  roles?: object[]; // Add the roles property
};

// Extend the Session type to use ExtendedUser
type ExtendedSession = Session & {
  user?: ExtendedUser;
};

// Extend the JWT type if you store roles in the token
type ExtendedJWT = JWT & {
  roles?: object[];
};


export const authOptions = {
  // Configure one or more authentication providers
  providers: [
    CredentialsProvider({
      credentials: {
        email: { label: 'Email', type: 'text' }, // The input field for the email
        password: { label: 'Password', type: 'password' }, // The input field for the password
      },
      async authorize(credentials) {
        const auth0Response = await authenticateWithAuth0(
          credentials?.email,
          credentials?.password
        );

        if (!auth0Response.isAuthenticated) {
          throw new Error(auth0Response.error?.toString() || 'Authentication failed');
        }

        const userProfile = await fetchUserProfileFromAuth0(auth0Response.accessToken);
        const managementApiToken = await getManagementApiToken();
        const userRoles = await fetchRolesFromAuth0(managementApiToken, userProfile.sub);

        return {
          id: userProfile.sub,
          name: userProfile.name,
          image: userProfile.picture,
          email: credentials?.email,
          roles: userRoles,
          accessToken: auth0Response.accessToken,
        };
      },
    })
  ],
  callbacks: {
    async session({ session, token }: { session: ExtendedSession, token: ExtendedJWT }) {
      if (!session.user) {
        session.user = { name: "", email: "" }; // Initialize user
      }

      // Now it's safe to assign roles to session.user
      if (token.roles) {
        session.user.roles = token.roles;
      }

      return session;
    },
    async jwt({ token, user }: { token: ExtendedJWT, user?: ExtendedUser }) {
      if (user?.roles) {
        token.roles = user.roles;
      }
      return token;
    },
    async signIn(user, account, profile) {
      // Implement custom logic to handle signIn
      return true;
    },
    // Your other callback implementations...
  },
  secret: process.env.SECRET as string,
};

export async function authenticateWithAuth0(
  email: string | undefined,
  password: string | undefined
) {
  const url = process.env.OKTA_OAUTH2_AUTHENTICATION_URL as string;
  const body = {
    connection: process.env.OKTA_OAUTH2_CONNECTION as string,
    grant_type: 'password', //Use password grant type for username/password authentication
    username: email,
    password: password,
    client_id: process.env.OKTA_OAUTH2_CLIENT_ID as string,
    client_secret: process.env.OKTA_OAUTH2_CLIENT_SECRET as string,
    audience: process.env.OKTA_OAUTH2_AUDIENCE_URL as string, //Specify the audience if you need access to Auth0 Management API
    scope: 'openid profile email',  //The scopes you need to access
  };

  try {
    const response = await fetch(url, {
      method: 'POST',
      headers: { 'Content-Type': 'application/json' },
      body: JSON.stringify(body),
    });

    if (!response.ok) {
      // If the authentication fails, throw an error with the error message from Auth0
      const errorData = await response.json();
      throw new Error(errorData.error_description || 'Authentication failed');
    }
    // On successful authentication, parse and return the token data
    const data = await response.json();

    return {
      isAuthenticated: true,
      accessToken: data.access_token,
      idToken: data.id_token,
      // You can include additional data as needed
    };
  } catch (error) {
    console.error('Error during authentication with Auth0:', error);
    return { isAuthenticated: false, error: error };
  }
}

async function getManagementApiToken() {
  const url = process.env.OKTA_OAUTH2_AUTHENTICATION_URL as string;
  const body = {
    client_id: process.env.OKTA_OAUTH2_MANAGEMENT_API_CLIENT_ID as string,
    client_secret: process.env.OKTA_OAUTH2_MANAGEMENT_API_CLIENT_SECRET as string,
    audience: process.env.OKTA_OAUTH2_AUDIENCE_URL as string,
    grant_type: 'client_credentials',
  };

  const response = await fetch(url, {
    method: 'POST',
    headers: { 'Content-Type': 'application/json' },
    body: JSON.stringify(body),
  });

  const data = await response.json();
  if (!response.ok) {
    throw new Error(data.error_description || 'Failed to obtain Management API token');
  }

  return data.access_token;
}

async function fetchUserProfileFromAuth0(accessToken: unknown) {
  const domain = process.env.OKTA_OAUTH2_DOMAIN as string;
  const response = await fetch(`https://${domain}.auth0.com/userinfo`, {
    headers: {
      Authorization: `Bearer ${accessToken}`,
    },
  });
  const userProfile = await response.json();
  return userProfile;
}

async function fetchRolesFromAuth0(accessToken: unknown, userId: unknown) {
  const domain = process.env.OKTA_OAUTH2_DOMAIN as string;
  const url = `https://${domain}.auth0.com/api/v2/users/${userId}/roles`;

  const response = await fetch(url, {
    headers: {
      Authorization: `Bearer ${accessToken}`,
    },
  });

  if (!response.ok) {
    console.log('response', response);
    throw new Error('Failed to fetch user roles');
  }

  const roles = await response.json();
  return roles;
}

export default NextAuth(authOptions);
Alright, let’s go through the code 🙂
authOptions Configuration
This object configures NextAuth.js and defines how your application handles authentication.
Providers Array
CredentialsProvider: This is configured to accept user credentials (email and password). It defines how users are authenticated. When a user submits their credentials, theauthorizefunction is called (We are using our own login form).
authorize Function
- This function is crucial for validating user credentials against Auth0. It performs the following steps:
- Calls
authenticateWithAuth0with the user’s email and password. - Checks if the authentication is successful. If not, it throws an error.
- Fetches the user’s profile and roles from Auth0 using the access token.
- Returns an object that represents the authenticated user, including their roles and access token.
Callbacks Configuration
Callbacks allow customizing the authentication behavior at various stages.
session Callback
- Enhances the session object with role information from the JWT token, ensuring role data is included in the user’s session.
jwt Callback
- Adds roles to the JWT token when it’s created. This is useful for persisting role information across sessions.
signIn Callback
- Provides a hook for implementing custom sign-in logic. This example always returns
true, allowing all sign-ins, but you could add custom logic here, such as additional verifications.
Helper Functions
These functions interact with Auth0 to authenticate users and fetch their data.
authenticateWithAuth0
- Authenticates the user with Auth0 using their email and password. It constructs a request to the Auth0 authentication API and returns an object indicating whether the authentication was successful, along with the access token and ID token.
getManagementApiToken
- Obtains an access token for the Auth0 Management API. This token is used to perform actions like fetching user roles.
fetchUserProfileFromAuth0
- Retrieves the user’s profile from Auth0 using the access token. This includes details like the user’s name, email, and profile picture.
fetchRolesFromAuth0
- Fetches the user’s roles from Auth0 using the Management API token. This information is used to enrich the user object with role data.
In short, this setup explains how our Next.js application verifies users with Auth0, adds roles to user sessions, and allows for customization through callbacks. Each function has a specific role in managing the authentication process, from checking credentials to handling user data and sessions.
We have one crucial part left. Determining whether a user is authenticated. If you recall, we implemented a flag/checkbox to indicate whether a page requires authentication. In our setup, the [[…path]].tsx page within the ‘pages’ directory catches everything, including Sitecore. This is where all the magic happens 🙂
In [[…path]].tsx, we will delve into the getServerSideProps method. Here, we will check if the Sitecore page requires authentication. Then, we assess whether the user is already authenticated. If not, we will redirect the user to the login page 🙂
  import { getServerSession } from 'next-auth/next';
  import { authOptions } from './api/auth/[...nextauth]'

  // Server-side
  // getServerSideProps
  // Retrieve the field from Sitecore
  // to check if page needs authentication
  const currentPageNeedsAuthentication =
    props.layoutData.sitecore.route?.fields?.NeedsAuthentication?.value ?? false;

  // Get the user session
  const session = await getServerSession(context.req, context.res, authOptions);

  // This sets the 'needsAuthentication' prop to indicate
  // whether the user is already logged in or not.
  // The prop will be available on the client-side (if needed)
  const needsAuthentication = currentPageNeedsAuthentication && !session;

  // Redirect to login page if the page needs authentication
  // and the user is not authenticated.
  if (needsAuthentication) {
    return {
      redirect: {
        destination: `/login?returnUrl=${pagePath}`,
        permanent: false,
      },
    };
  }
In my next post, I’ll dive into the crucial scenarios of ‘Forgot Password’ and ‘User Registration.’ Stay tuned for more insights and solutions!
That’s all for now folks 🙂

Very useful!
LikeLike