Friends I hope you are enjoying spring. The month of May in Sweden is truly beautiful. The landscape bursts into lush greenery, flowers bloom, and the weather becomes comfortably warm. It’s a perfect time to enjoy outdoor activities and experience the stunning natural beauty of the country. 🙂
But as a coder, who wants to be outside when you can stay indoors in a dark room and code all day in front of your screen? 😉
In my previous post, Add authentication to your Sitecore site using Auth0 with NextJs, I discussed how to integrate Auth0 into your Sitecore Next.js site. Continuing with this theme, let’s now explore how to add the Forgot Password functionality.
Let’s start 🙂
We will update the login component, so that we can offer users to change their password.
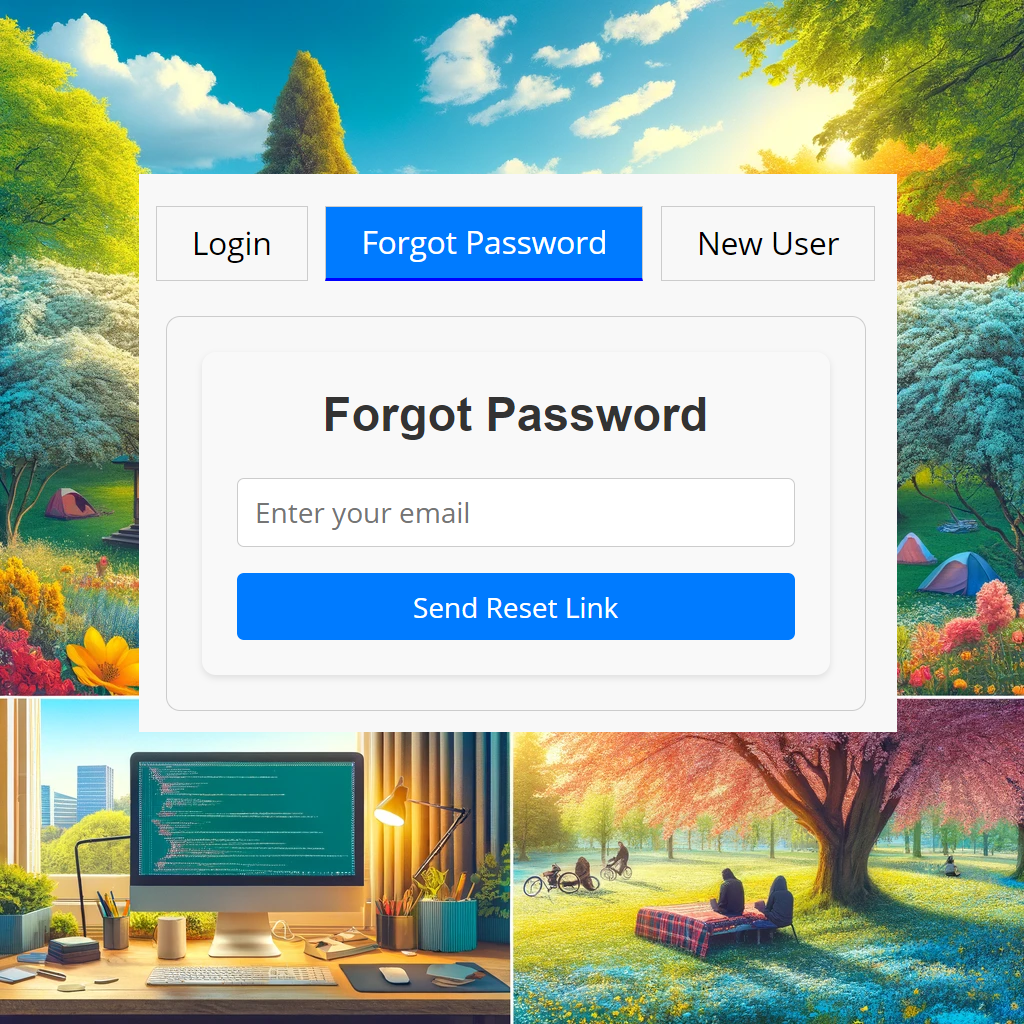
In our LoginForm component, we will add the UI for the Forgot Password feature:
{activeTab === 'forgotPassword' && (
        <div className={styles.generalForm}>
          <form className={styles.form} onSubmit={handleForgotPasswordSubmit}>
            <h2 className={styles.title}>Forgot Password</h2>
            <input className={styles.input} name="email" type="email" placeholder="Enter your email" required />
            <button className={styles.button} type="submit">Send Reset Link</button>
          </form>
        </div>
)}
And the handler function handleForgotPasswordSubmit will manage the form submission for the Forgot Password feature:
const handleForgotPasswordSubmit = async (event: { preventDefault: () => void; currentTarget: HTMLFormElement | undefined; }) => {
    event.preventDefault();
    const formData = new FormData(event.currentTarget);
    const email = formData.get('email');

    // Assuming you have an API endpoint or NextAuth.js method to handle password reset
    try {
      const res = await fetch('/api/auth/changePassword', {
        method: 'POST',
        headers: {
          'Content-Type': 'application/json',
        },
        body: JSON.stringify({
          email
        }),
      });

      if (!res.ok) {
        throw new Error(res.errors);
      }

      setActiveTab('login');
      setErrorMessage(''); // Clear any existing error messages
      setSuccessMessage('Password reset email sent successfully. Please check your email.');
      setTimeout(() => {
        setSuccessMessage(''); // Optionally clear the success message after some time
      }, 5000); // 5000 milliseconds = 5 seconds

      console.log('Sending password reset email to:', email);
      // Reset form or show a success message
    } catch (error) {
      console.error('Password reset error:', error);
      setErrorMessage('Failed to send password reset email. Please try again.');
    }
  };
Let’s take a look at what our handleForgotPasswordSubmit function is doing under the hood:
- Stopping the Default Form Action:
- First things first, we use
event.preventDefault()to stop the form from doing its default thing, which is reloading the page. This lets us handle the form submission with our own code.
- First things first, we use
- Grabbing the Email Address:
- Next, we pull out the email address from the form. We use the
FormDataAPI to get the data from the form element that triggered the event. This email is essential because it tells us who wants to reset their password.
- Next, we pull out the email address from the form. We use the
- Sending the Password Reset Request:
- Now, we send a
POSTrequest to our/api/auth/changePasswordendpoint. This endpoint is where we handle the password reset process. - The request body includes the email address we extracted, and we make sure to set the
Content-Typetoapplication/json.
- Now, we send a
- Handling the API Response:
- If the request is successful (we get a status code in the 200 range), we do a few things:
- Switch back to the login tab using
setActiveTab('login'). - Clear any error messages with
setErrorMessage(''). - Show a success message to let the user know that the password reset email has been sent. We use
setSuccessMessage('Password reset email sent successfully. Please check your email.'). - Optionally, we clear the success message after 5 seconds with a
setTimeout. - Log the email to the console, just for our reference.
- Switch back to the login tab using
- If the request is successful (we get a status code in the 200 range), we do a few things:
- Catching Errors:
- If something goes wrong and the request fails, we catch the error.
- We log the error to the console for debugging.
- We set an error message to let the user know that the password reset email couldn’t be sent and to try again. This is done using
setErrorMessage('Failed to send password reset email. Please try again.').
In a nutshell, our handleForgotPasswordSubmit function takes care of the whole “Forgot Password” process smoothly, making sure users get the feedback they need whether things go right or wrong.
Let’s continue and create the endpoint /api/auth/changePassword that handles password change requests for users through Auth0.
export default async function handler(req, res) {
    const domain = process.env.DOMAIN;
    const connection = process.env.CONNECTION;
    const client_id = process.env.CLIENT_ID;

    if (req.method === 'POST') {
      const { email } = req.body;

      try {
        const auth0Res = await fetch(`https://${domain}.auth0.com/dbconnections/change_password`, {
          method: 'POST',
          headers: {
            'Content-Type': 'application/json',
          },
          body: JSON.stringify({
            client_id,
            email,
            connection,
          }),
        });

        if (!auth0Res.ok) {
          throw new Error(`Change password failed: ${await auth0Res.text()}`);
        }

        // Since the expected response is not JSON, just read the text response
        const responseText = await auth0Res.text();
        res.status(200).json({ success: true, message: responseText });
      } catch (error) {
        res.status(500).json({ success: false, error: error.message });
      }
    } else {
      res.setHeader('Allow', ['POST', 'OPTIONS']);
      res.status(405).end(`Method ${req.method} Not Allowed`);
    }
}
Let’s take a look at what our handler function is doing under the hood:
- Setting Up Variables:
- First, we grab some configuration details from environment variables: the Auth0 domain, connection, and client ID.
- Handling the Request Method:
- This function is set to handle HTTP
POSTrequests. If it receives a different kind of request, it will respond with a405 Method Not Allowedand specify that onlyPOSTandOPTIONSmethods are allowed.
- This function is set to handle HTTP
- Extracting the Email:
- When a
POSTrequest comes in, we extract the email address from the request body. This email is needed to know who wants to reset their password.
- When a
- Sending the Password Reset Request to Auth0:
- We then make a
POSTrequest to Auth0’schange_passwordendpoint. This request includes the client ID, email, and connection name, all formatted as JSON. - The
Content-Typeheader is set toapplication/jsonto ensure the server knows we’re sending JSON data.
- We then make a
- Handling the Response from Auth0:
- If Auth0 responds with a success status (in the 200 range), we read the response text and send a
200 OKresponse back to the client with a success message. - If Auth0 responds with an error, we throw an error with the message from Auth0’s response.
- If Auth0 responds with a success status (in the 200 range), we read the response text and send a
- Error Handling:
- If any part of the request fails, we catch the error and respond with a
500 Internal Server Errorand include the error message in the response.
- If any part of the request fails, we catch the error and respond with a
Our handler function is all about sending a password reset request to Auth0. It takes an email address, sends it to Auth0, and handles the response. If everything goes well, it lets the user know a password reset email is on its way. If something goes wrong, it catches the error and sends back a helpful error message.
And that’s it! Now you’ve got a smooth Forgot Password process integrated into your Sitecore Next.js site using Auth0. It’s always a good feeling to make your app more user-friendly, isn’t it?
I hope you found this guide helpful and that it makes your coding journey a bit easier. If you have any questions, run into issues, or just want to share how it’s going, drop a comment below or reach out to me. I’m always happy to chat!
That’s all for now folks 😊
