
Dear Sitecorians! Keep up the good fight and don’t let Corona beat you!
Today’s post will be about automating the UI test/s we created in the previous post – Let the power of UI Tests help your Sitecore Solution together with… Purple Rain, no I mean Purple Steps
Our good friend Azure DevOps, together with Hosted Agents, will be the beacon in the night
As always we will work with a fork from the great Sitecore Helix Examples at GitHub.
Here is the fork – helix-basic-tds-with-docker-vs2019-project-type
Before we start, a smaller code change is needed in BasicCompany.Foundation.Common.UITests.Infrastructure.ConfigurationBinding. When the build is in Release mode, we want to be sure the environment variables override the app settings(specflow.json):
private IConfiguration GetConfiguration()
{

  var configuration = new ConfigurationBuilder()
    .SetBasePath(Directory.GetCurrentDirectory());

#if DEBUG
  configuration.AddEnvironmentVariables();
  configuration.AddJsonFile("specflow.json", optional: false, reloadOnChange: true);
#else
  configuration.AddJsonFile("specflow.json", optional: false, reloadOnChange: true);
  configuration.AddEnvironmentVariables();
#endif

  return configuration.Build();

}
In Debug mode the app settings(specflow.json) have the final say. In Release mode it’s the other way around 🙂
Time to create a Build Pipeline. We need it to get the UI tests published => Build and deploy DLL’s to folder PublishedUITests. The build will be triggered every time something is pushed to Master branch. The important part is the task: DotNetCoreCLI@2 – Publish UI Tests. The environment variable MSBUILDSINGLELOADCONTEXT is needed to make SpecFlow work with .NET Core 3.1.200.
trigger:
- master

pool:
  vmImage: 'windows-latest'

variables:
  solution: 'examples/helix-basic-tds-with-docker-vs2019-project-type/BasicCompany.sln'
  buildPlatform: 'Any CPU'
  buildConfiguration: 'Release'

steps:
- task: NuGetToolInstaller@1

- task: NuGetCommand@2
  inputs:
    command: 'restore'
    restoreSolution: '$(solution)'
    feedsToUse: 'config'

- task: VSBuild@1
  displayName: 'Build solution'
  inputs:
    solution: '$(solution)'
    platform: '$(buildPlatform)'
    configuration: '$(buildConfiguration)'

- task: VSTest@2
  displayName: 'Run unit tests'
  inputs:
    testSelector: testAssemblies
    testAssemblyVer2: |
     **\*Tests.dll
     !**\*UITests.dll
    runInParallel: true
    codeCoverageEnabled: true

- task: DotNetCoreCLI@2
  displayName: 'Publish UI Tests'
  env:
    MSBUILDSINGLELOADCONTEXT: 1
  inputs:
    command: publish
    publishWebProjects: false
    projects: '**/*UITests.csproj'
    arguments: '--configuration $(buildConfiguration) -o $(build.artifactstagingdirectory)/PublishedUITests'
    zipAfterPublish: false
    modifyOutputPath: false

- task: PublishBuildArtifacts@1
  displayName: 'Publish Artifact'
  inputs:
    PathtoPublish: '$(build.artifactstagingdirectory)'
  condition: succeededOrFailed()
*Building the solution and running the unit tests are optional. In order to run the unit tests, we need to exclude the UI tests.
Let’s run the build:

Success 🙂
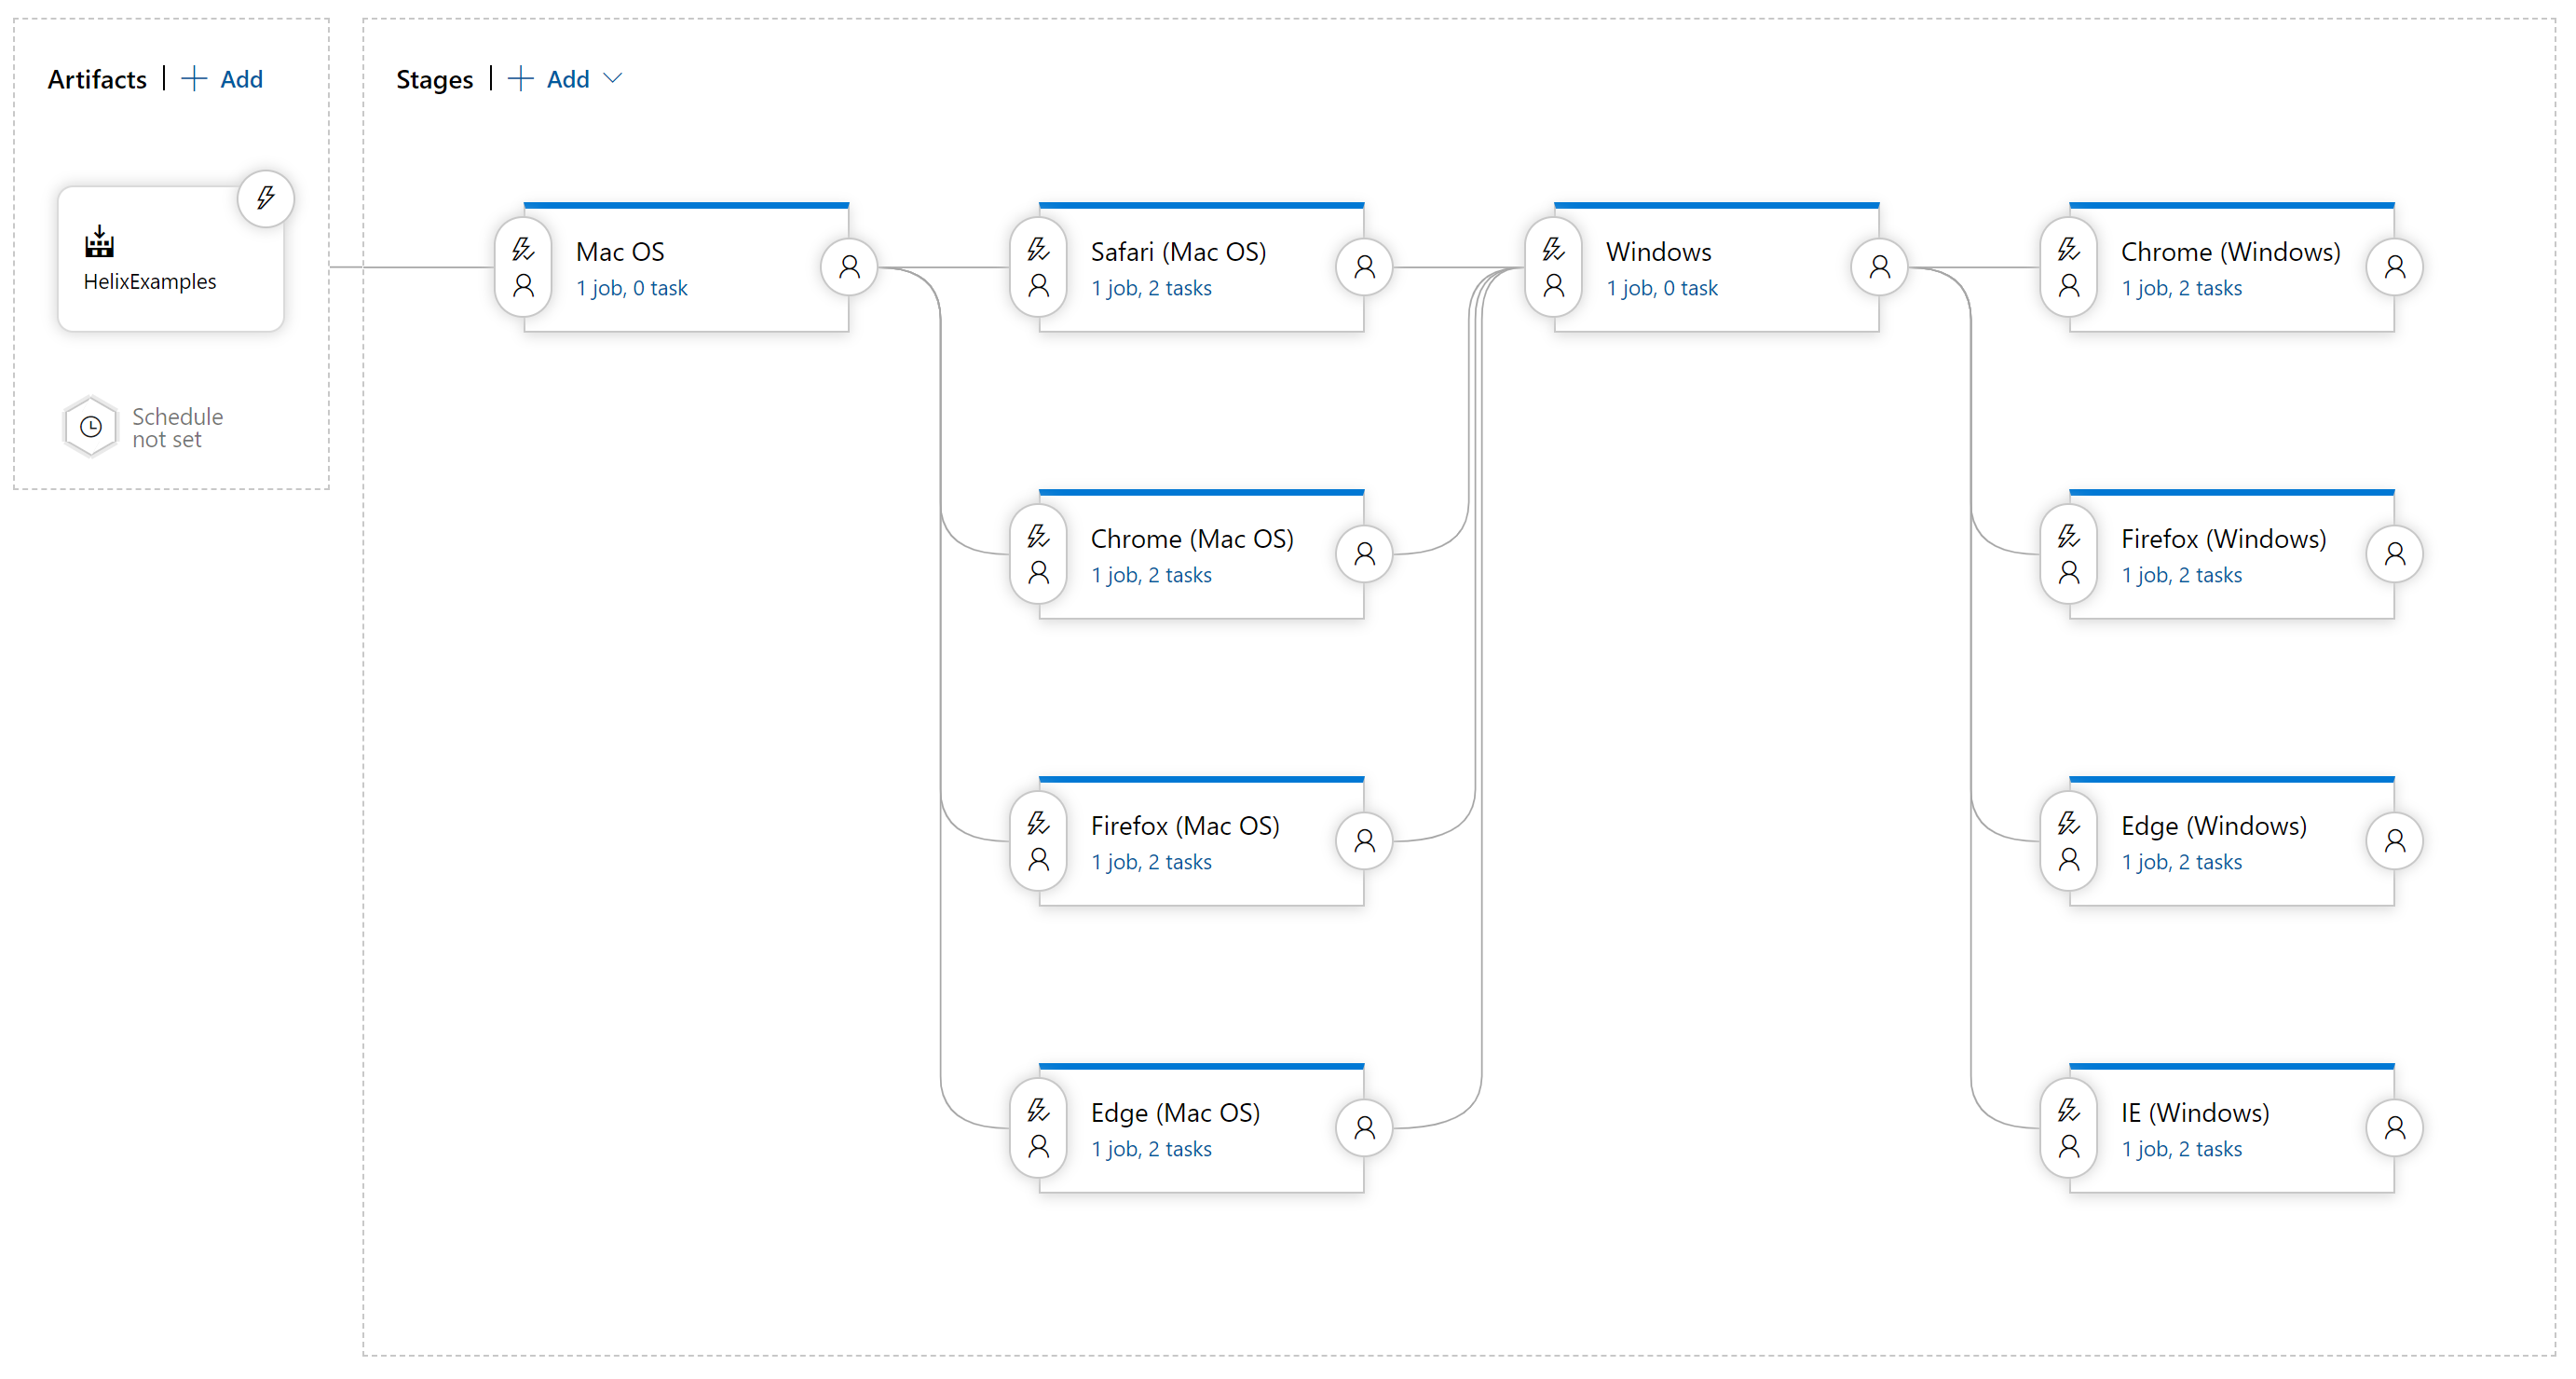
Next is to set up the Release Pipeline. The idea is to run UI tests on Windows and Mac OS, with browsers: Safari, Chrome, Firefox, Edge and Internet Explorer.
Yes, you read it correctly – Mac OS. So how is this possible? Well, if you guys remembered (in the previous post) we created the UI tests in .Net Core and .Net Core is cross platform. That means it runs on Windows, Linux and… Mac OS 🙂
First, we will create two “empty” stages (agentless jobs): Windows and Mac OS
 Why this? It’s a good way to gather/group stages, in this case “browser type” stages.
Following “browser type” stages will be created:
Chrome for Windows
Firefox for Windows
Edge for Windows
Safari for Mac OS
Chrome for Mac OS
Firefox for Mac OS
Edge for Mac OS
They will look quite the same and will consist of a Hosted Agent, a step for running the UI tests and finally a step for publishing the test results. Here is how “Safari (Mac OS)” is set up.
1. Choose what Hosted Agent to run
 So what are hosted agents?
Azure Pipelines provides a Microsoft-hosted agent pool named Azure Pipelines that offers several virtual machine images to choose from, each including a broad range of tools and software.
Windows Server 2019 with Visual Studio 2019
Windows Server 2016 with Visual Studio 2017
Ubuntu 18.04
Ubuntu 16.04
macOS X Mojave 10.14
macOS X Catalina 10.15
For Safari (Mac OS) we will go for macOS X Catalina 10.15.
2. Create step – Run UI tests
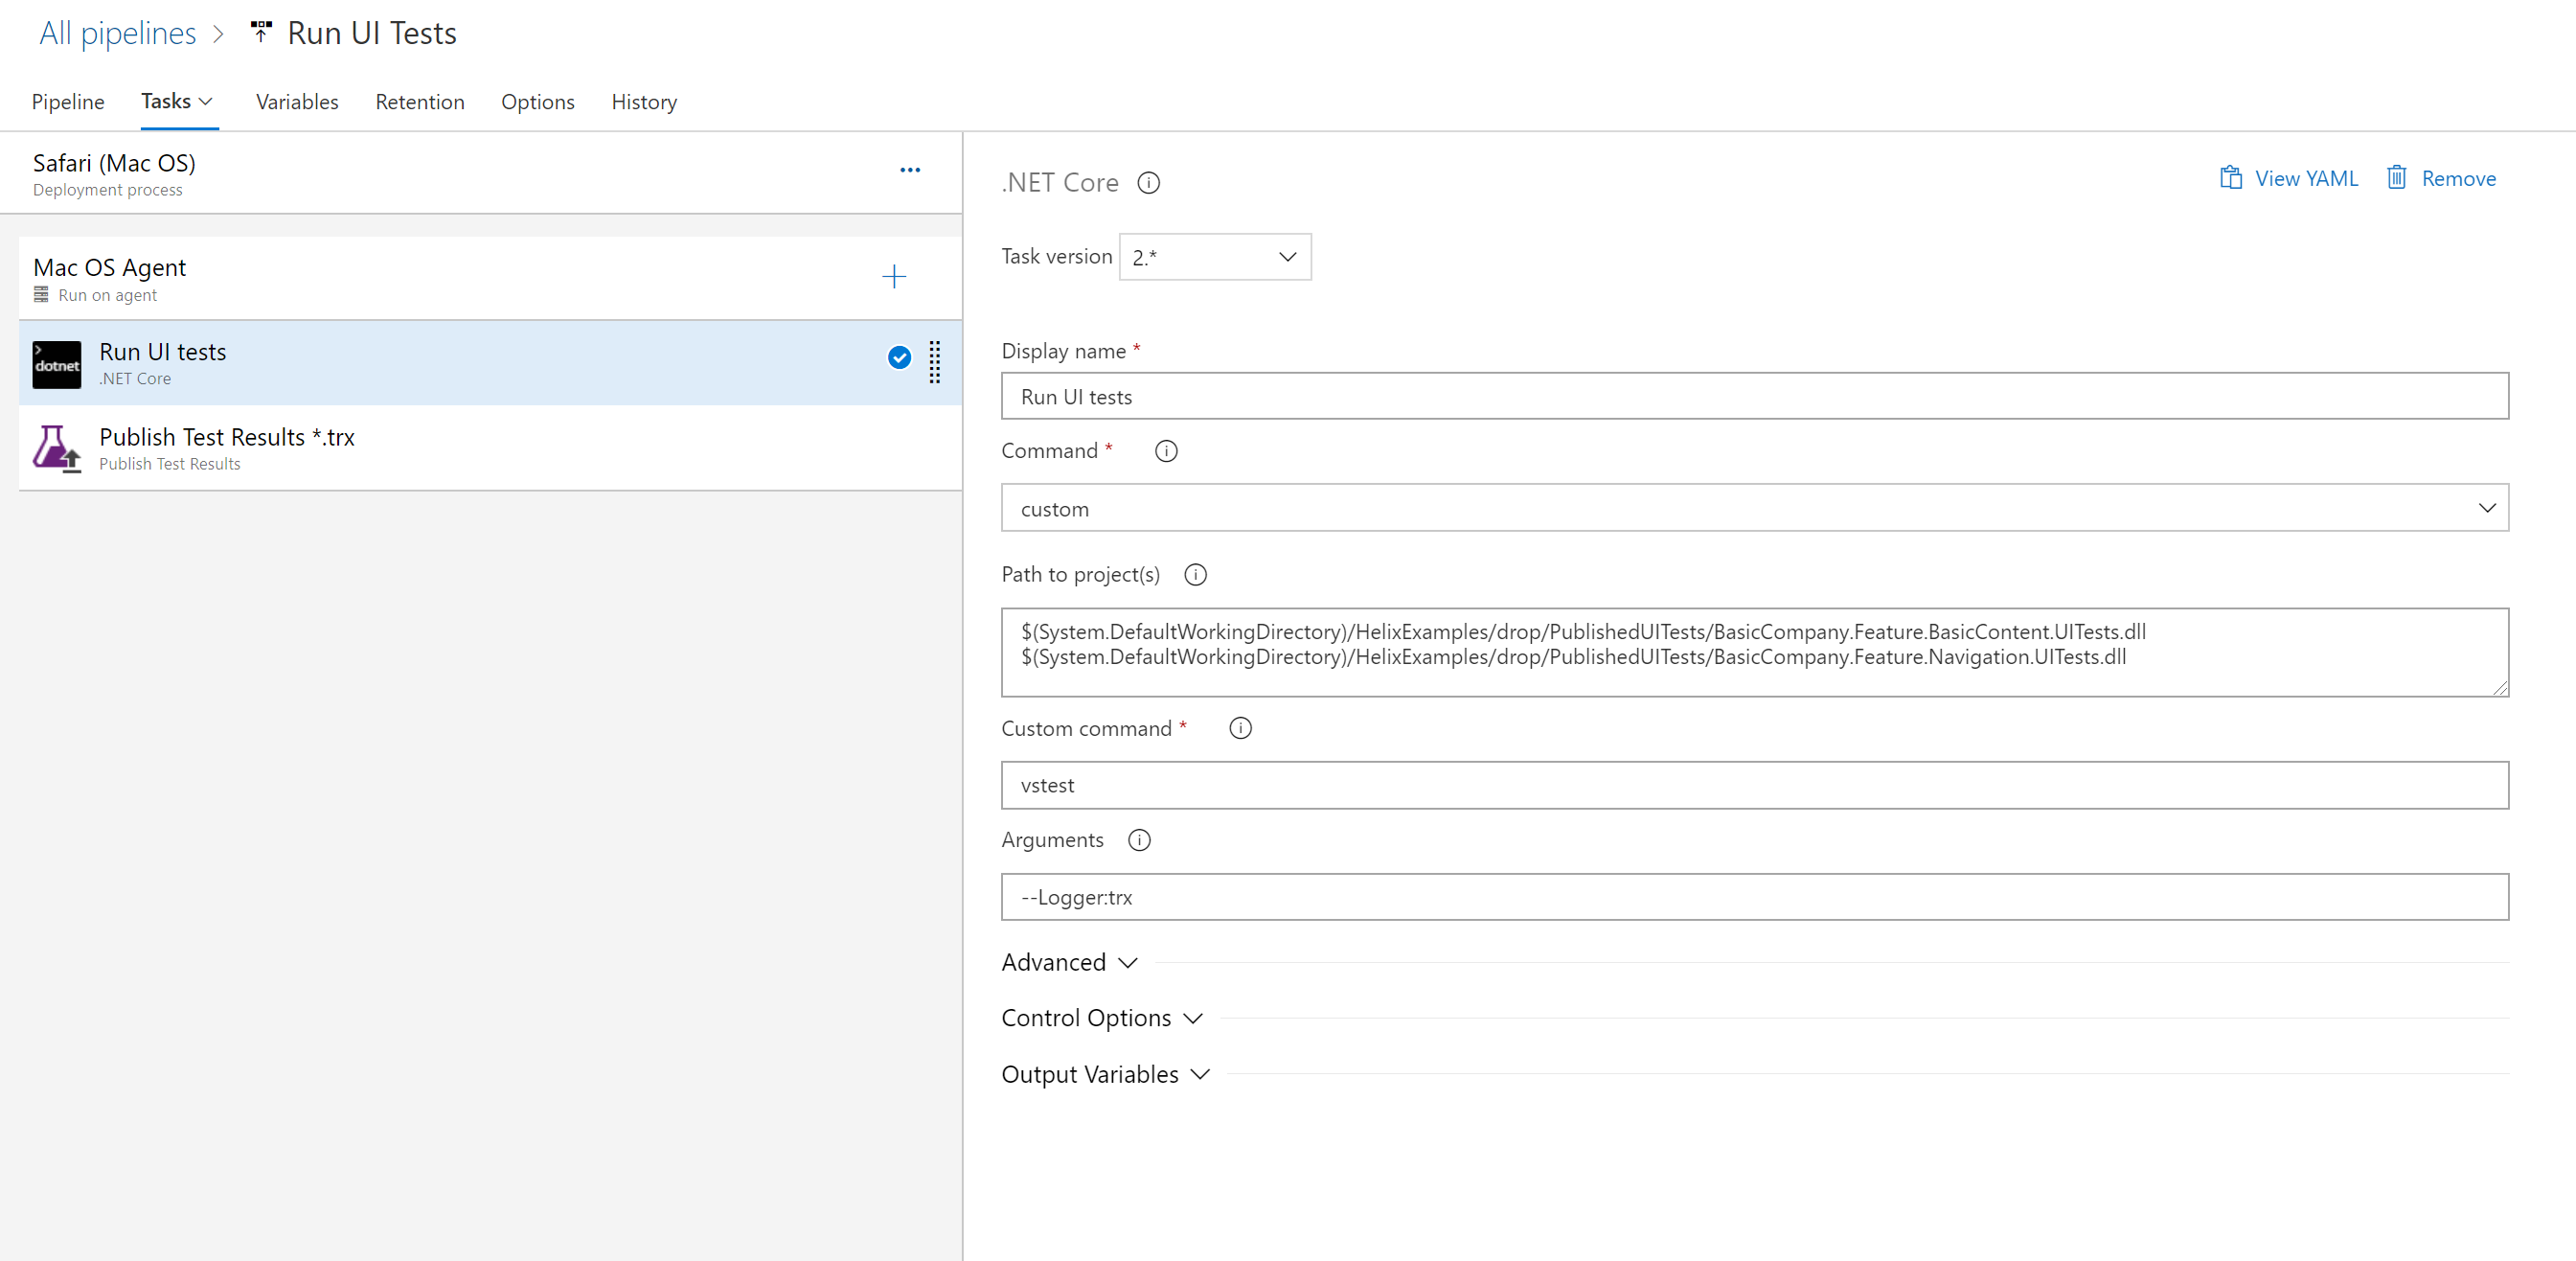 Notice the “custom” command, it’s because we need to use a command that is not listed within the “commands” – vstest. The arguments Logger:trx, will specify what format to log the test execution results (trx is the Visual Studio Test Results File format). Using this argument a ‘TestResults’ folder will be created and a trx-file will be created inside the folder. Finally we set what UI tests to run:
$(System.DefaultWorkingDirectory)/HelixExamples/drop/PublishedUITests/BasicCompany.Feature.BasicContent.UITests.dll
$(System.DefaultWorkingDirectory)/HelixExamples/drop/PublishedUITests/BasicCompany.Feature.Navigation.UITests.dll
3. Create step – Publish Test Results *.trx
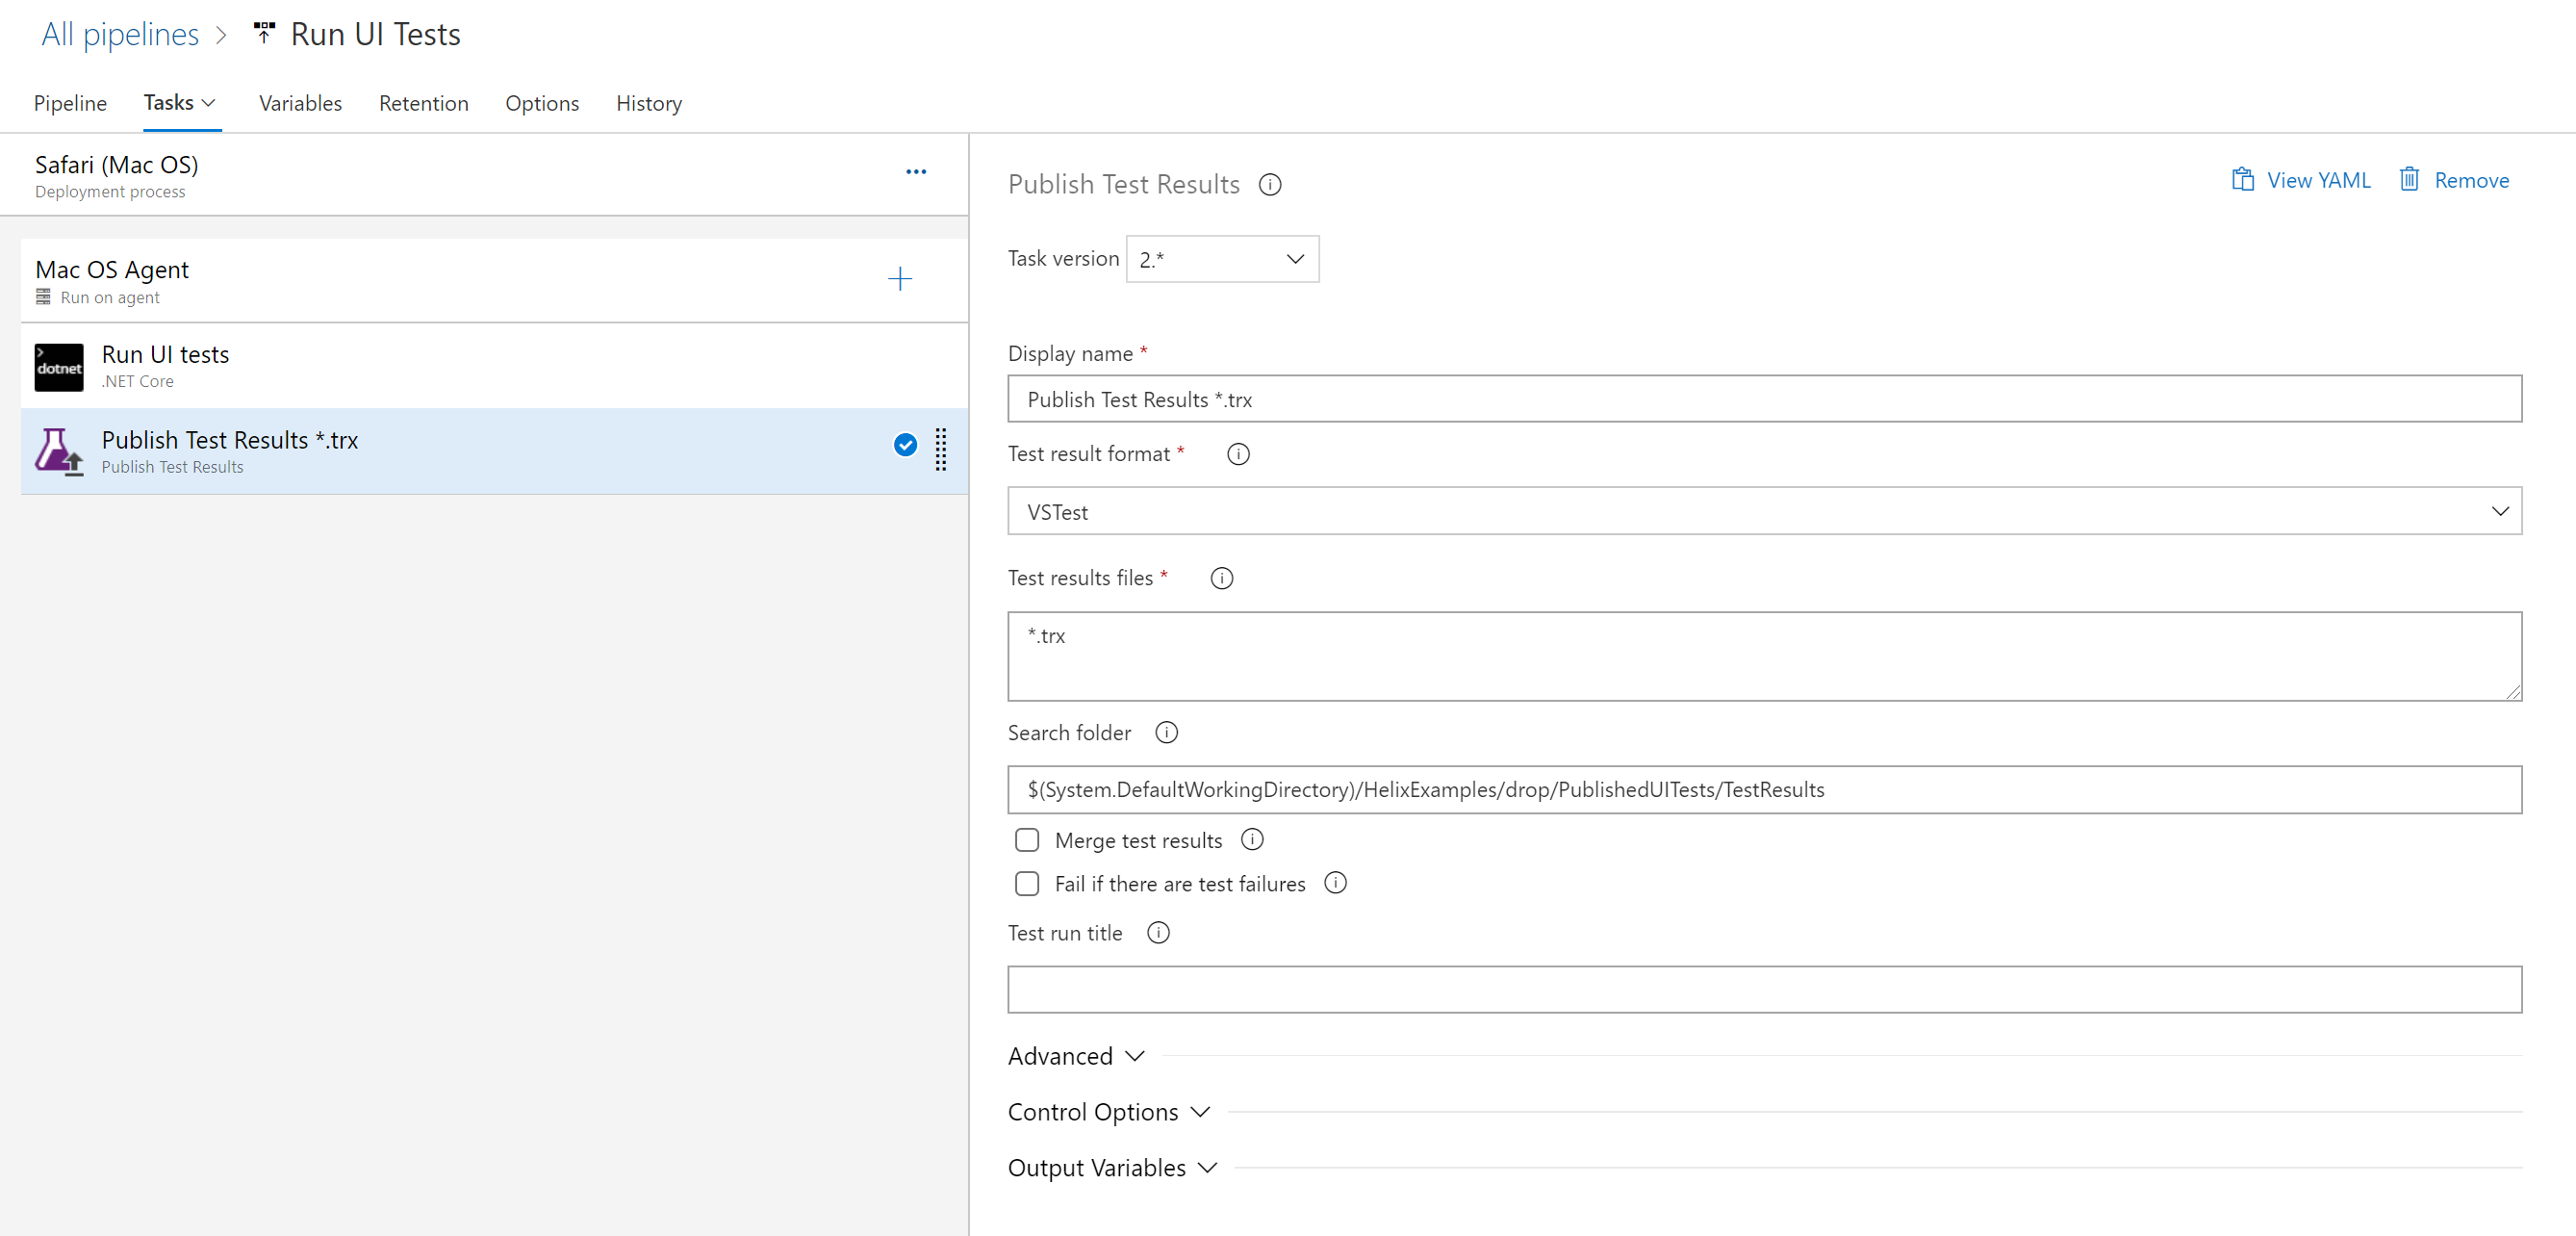 The task expect VSTest format result files and will search for trx-files. The result files will be used to populate the Tests results interface in Azure DevOps.
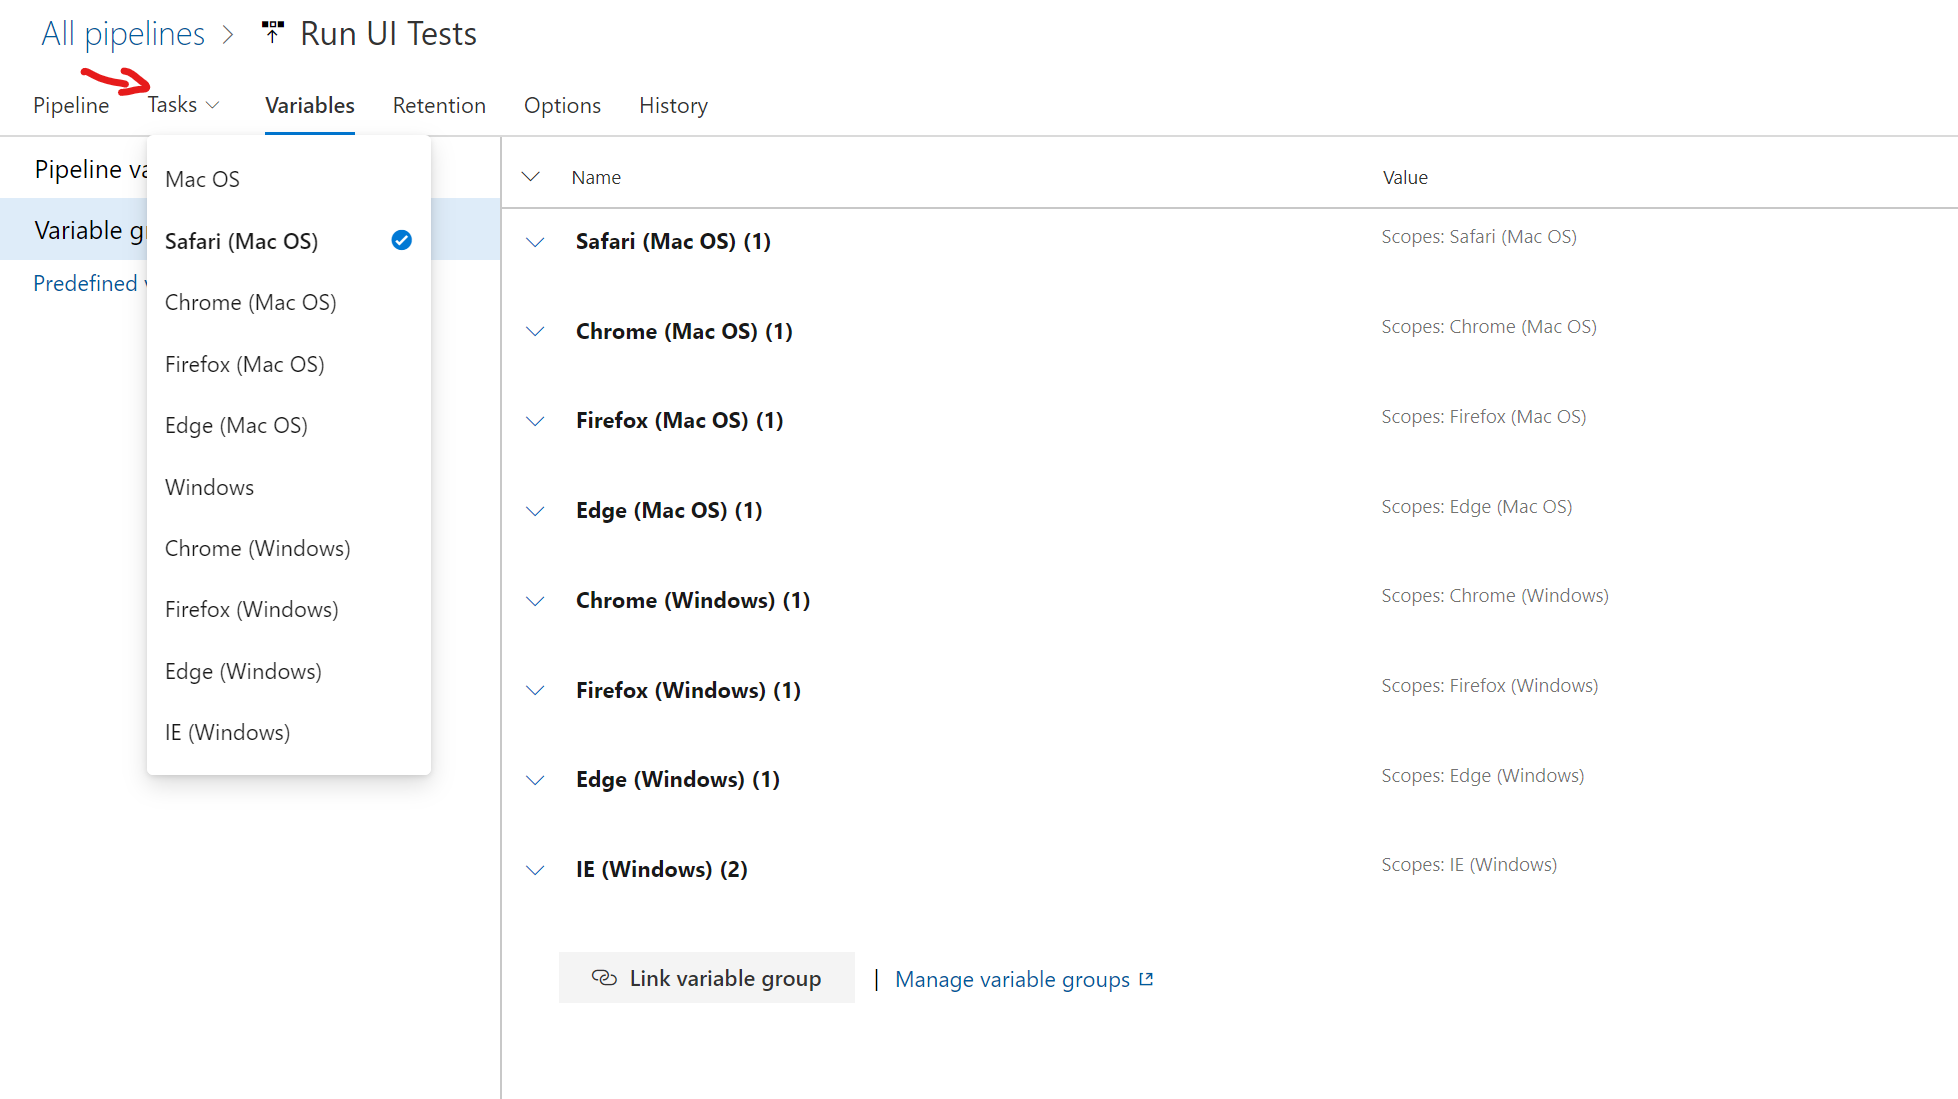
Cool, we have now set up the “browser type” stages. But where do we set what browser to use? Don’t worry, we will use Variable Groups for that.
Use a variable group to store values that you want to control and make available across multiple pipelines. You can also use variable groups to store secrets and other values that might need to be passed into a YAML pipeline. Variable groups are defined and managed in the Library page under Pipelines.
This means we will create a variable group for each “browser type” stage:
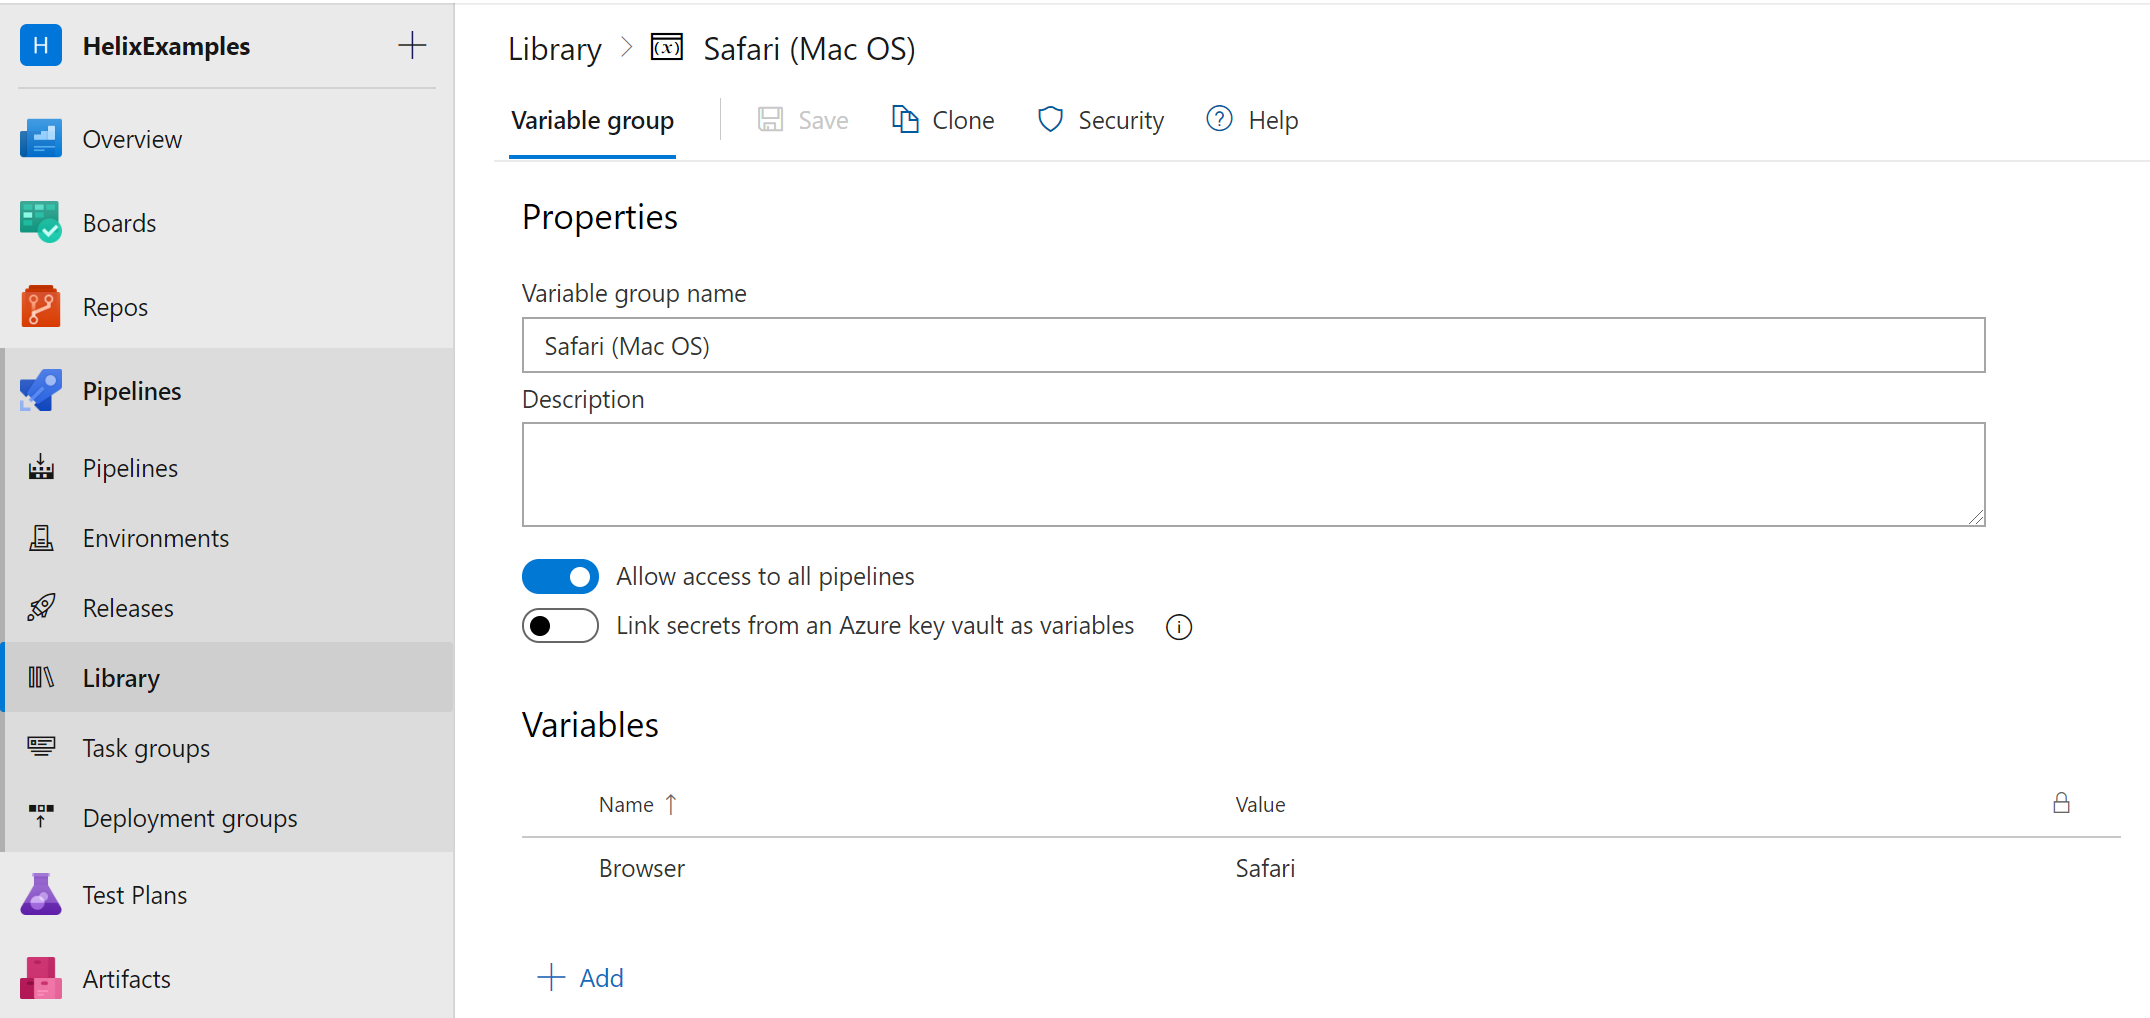 The variable group will contain browser information. For Safari it’s just the name => Browser : Safari
It means that the variable will override the appsettings variable in the solution.
Here are the rest:
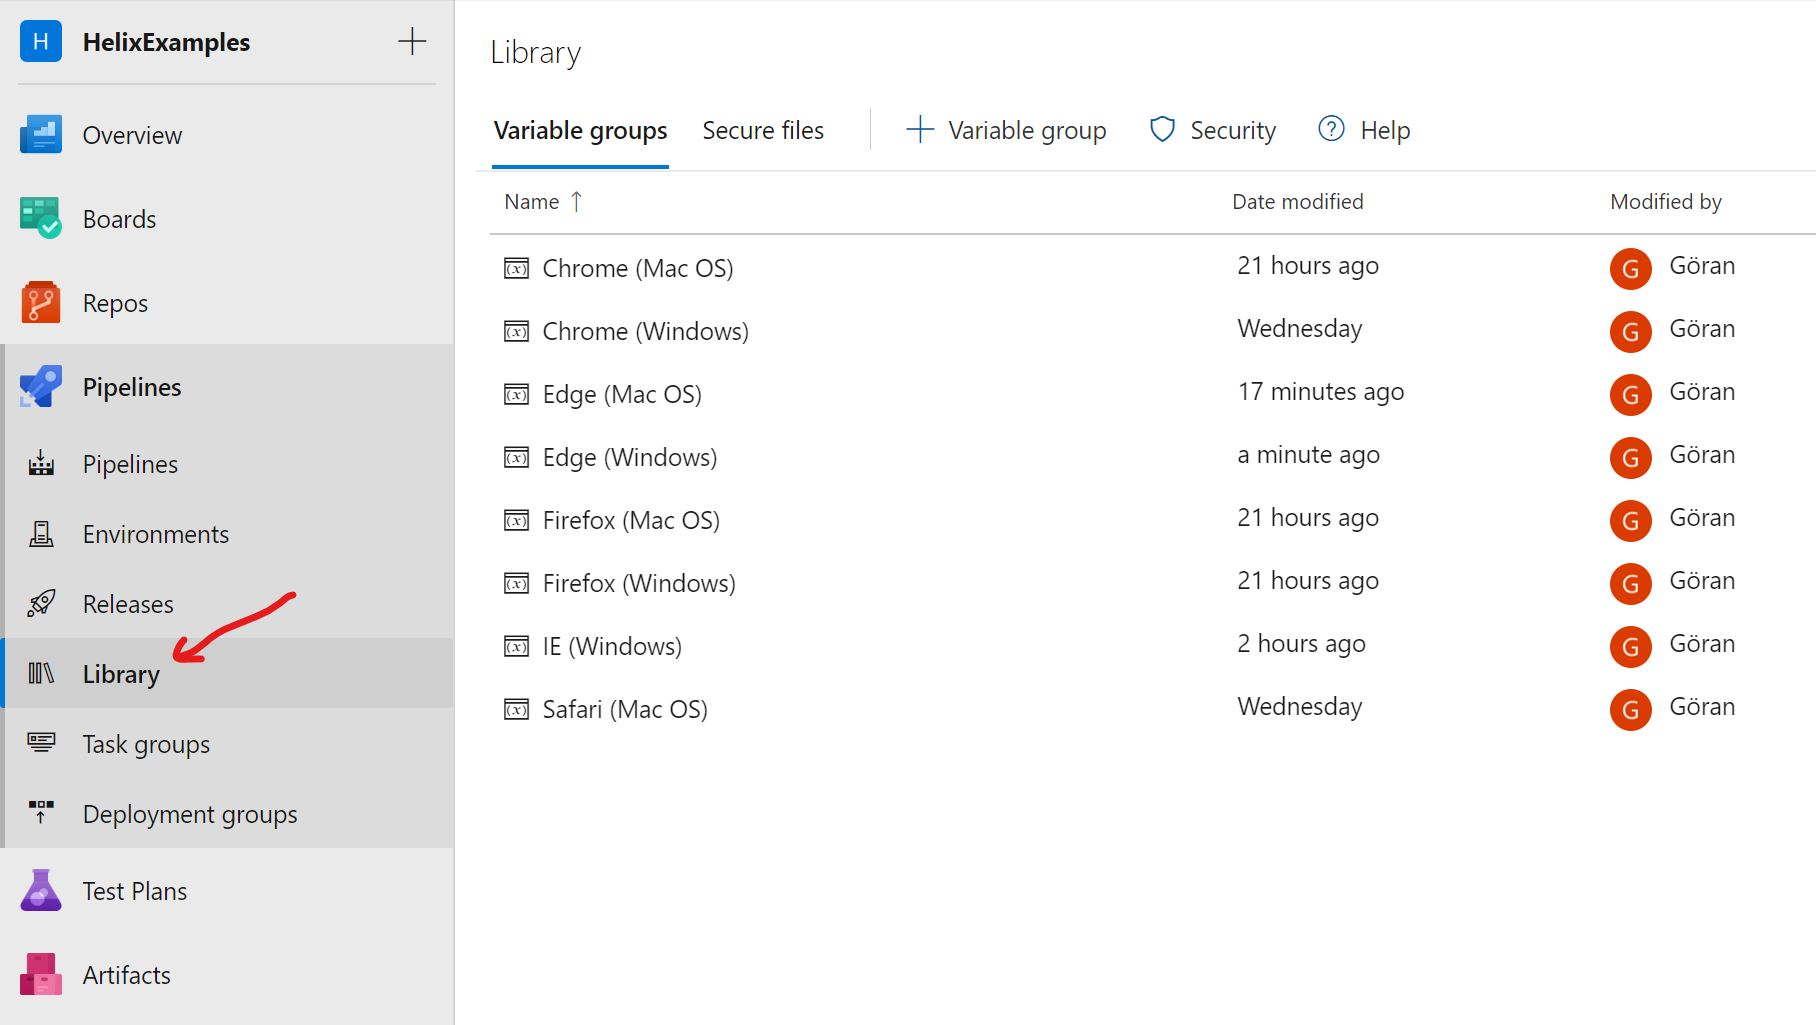
Now we just have to link/map the variable group to the correct “browser type” stage. E.g. variable group Safari (Mac OS) will link to stage Safari (Mac OS)
 .
.
Here is the lovely Release Pipeline 🙂
We have one thing left before the Release Pipeline is complete. We need to set the BaseUrl variable, it will be a “standard” variable:
 Wait a minute, what strange URL is that?
Let me explain…
Instead of deploying our website to Azure, we will run it locally. We will do this by using Ngrok
What is ngrok?
ngrok exposes local servers behind NATs and firewalls to the public internet over secure tunnels.
How it works
You download and run a program on your machine and provide it the port of a network service, usually a web server. It connects to the ngrok cloud service which accepts traffic on a public address and relays that traffic through to the ngrok process running on your machine and then on to the local address you specified.
We will follow the instructions, download ngrok and make our local website public with the following command:
.\ngrok.exe http 44001
Now we have a public website 🙂

Just copy that URL and paste it in the BaseUrl variable.
Cool! Time to run the Release pipeline 🙂
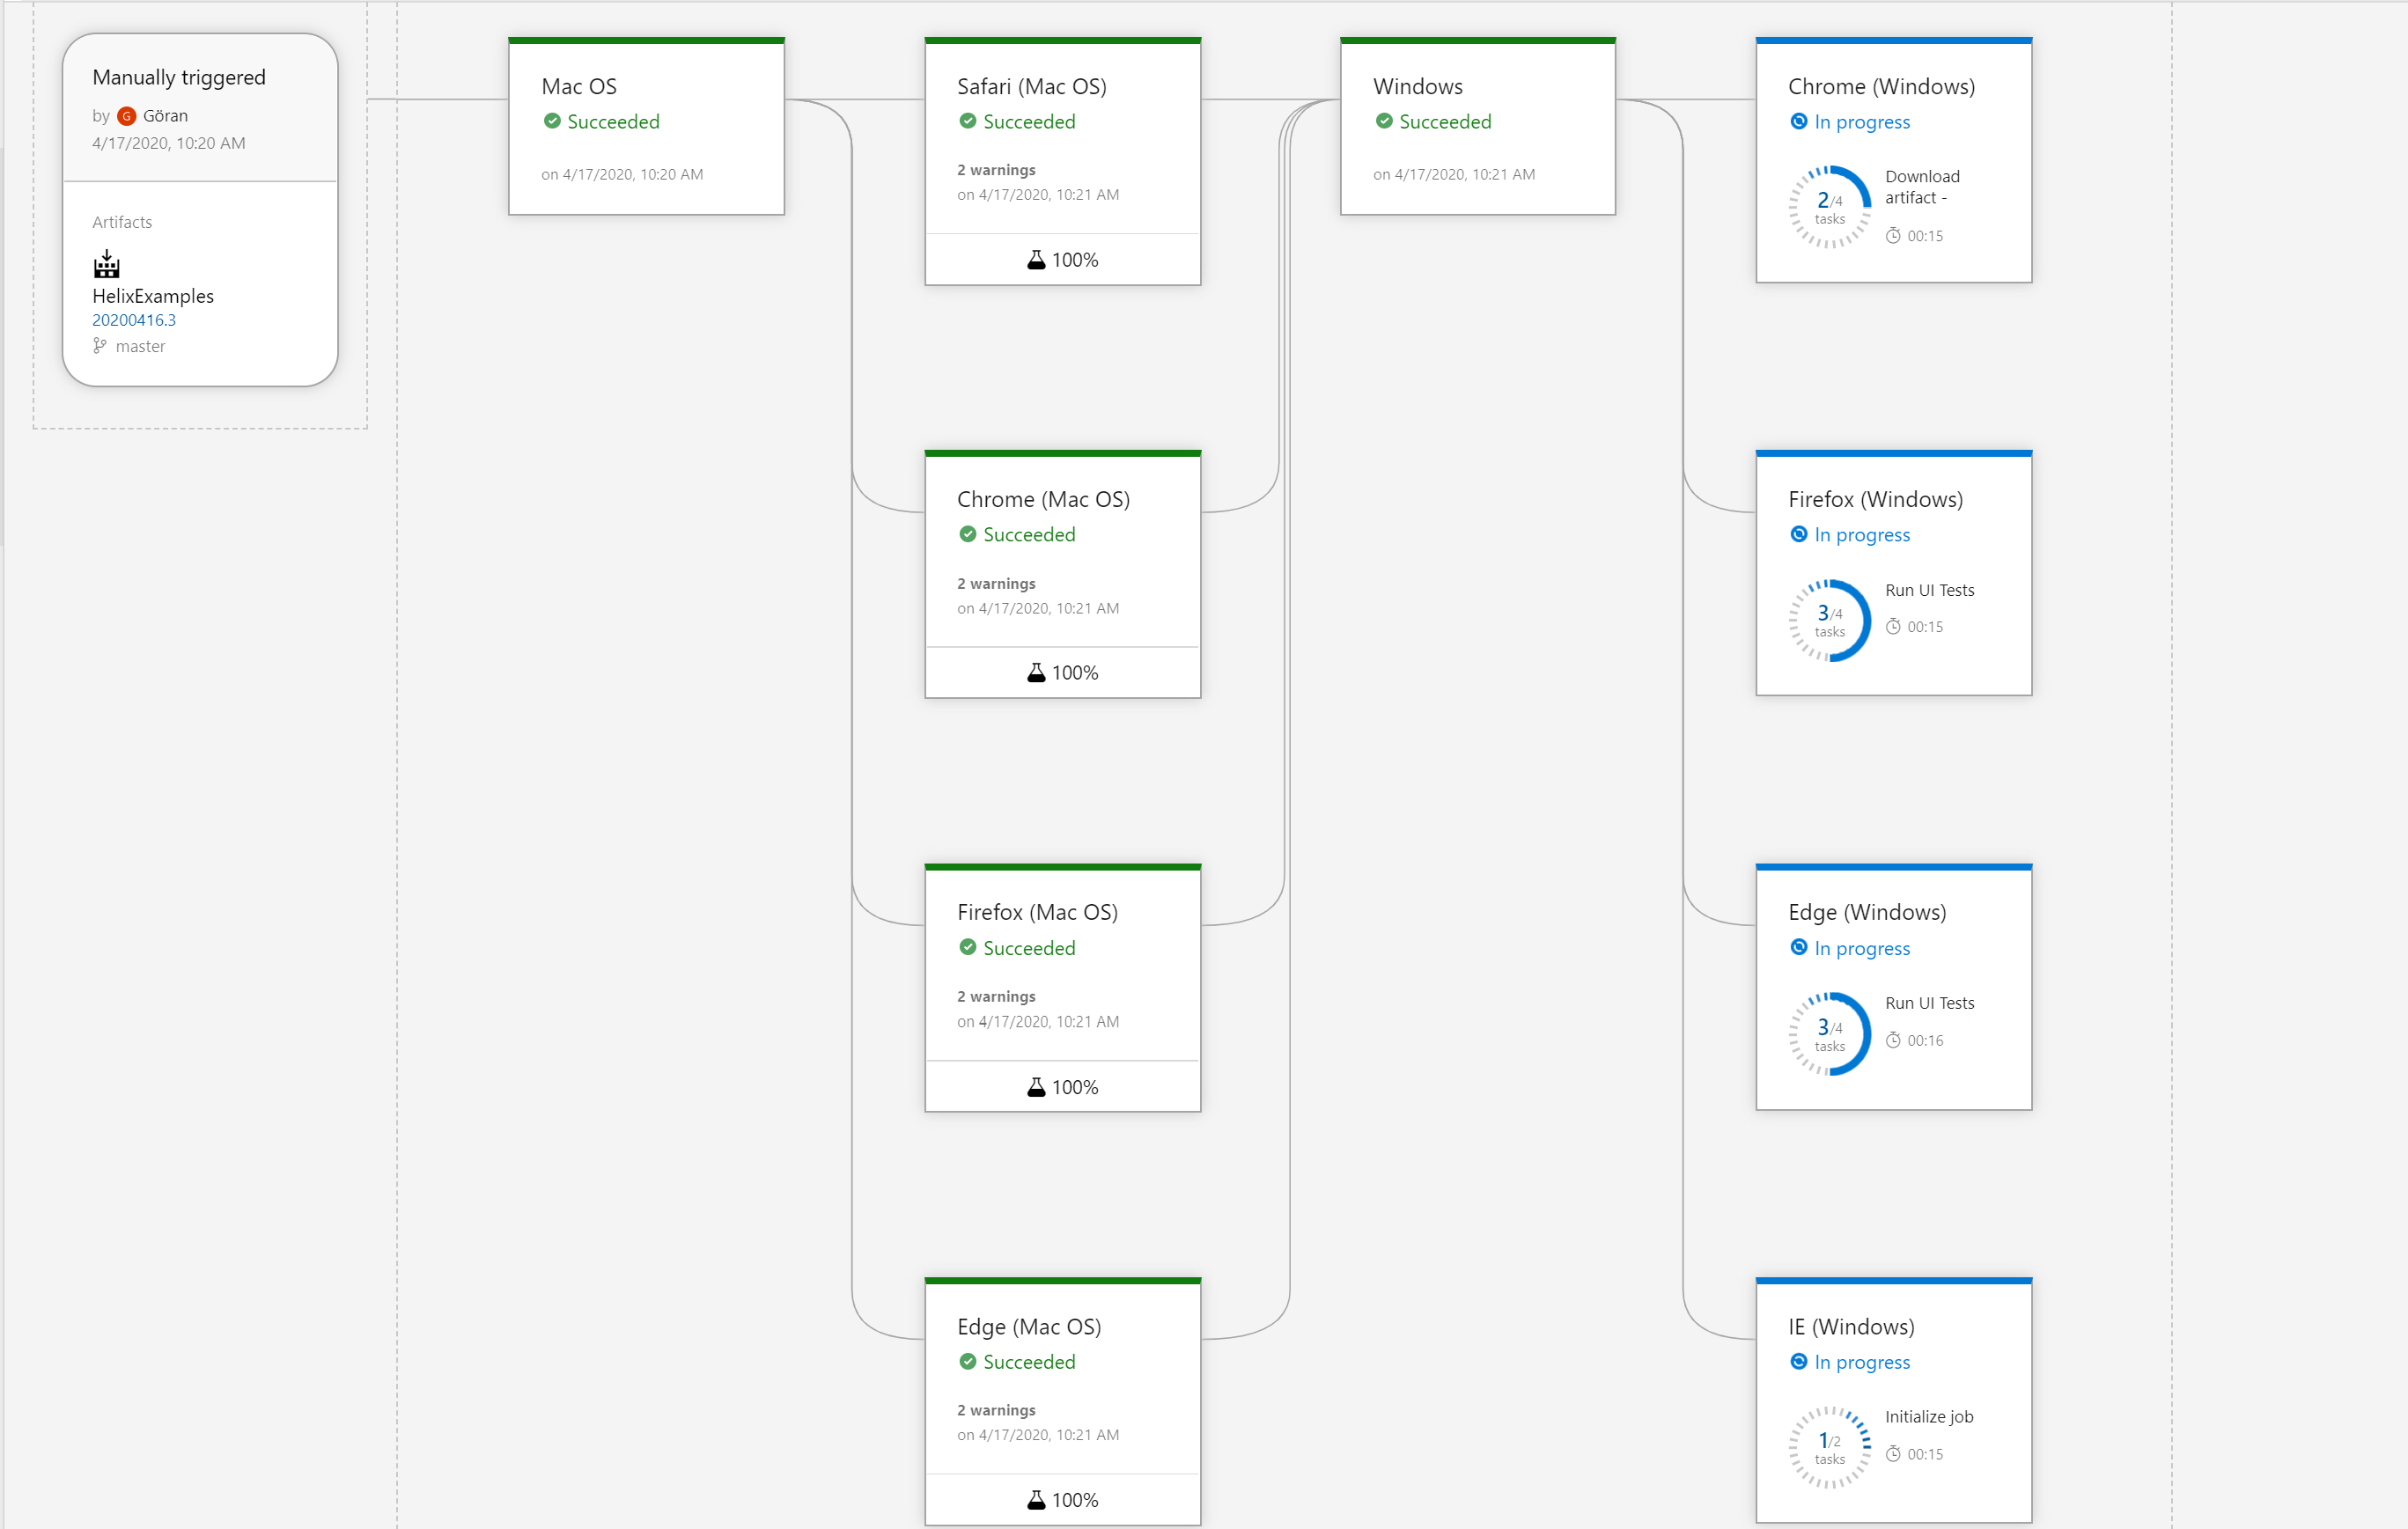 Looking good!
Here are the UI tests result for Safari (Mac OS):
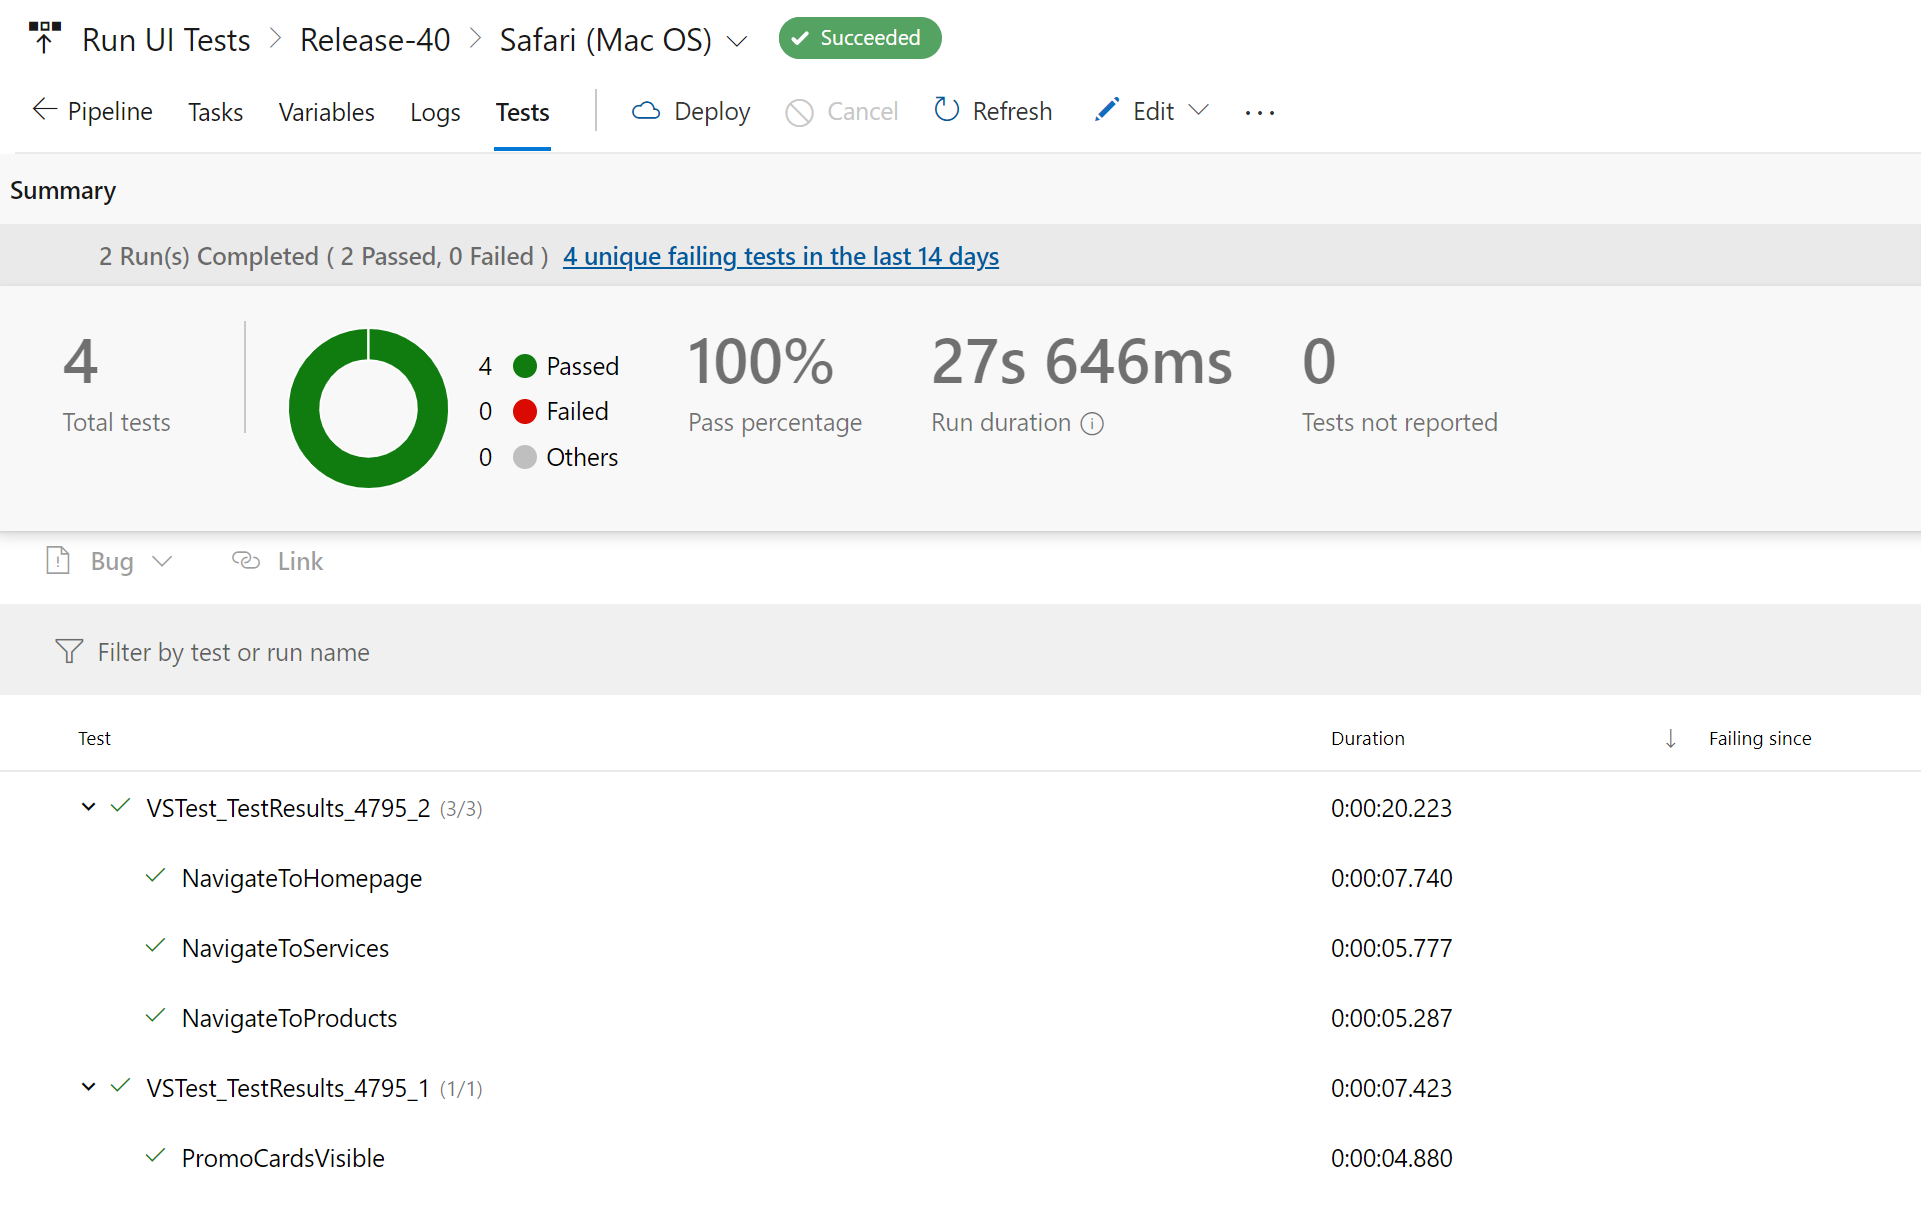
This is huge, we are now running “live” UI tests on Mac and Windows. How cool is that! Thank you Microsoft for the lovely Hosted Agents.
That’s all for now folks 🙂
