
Good friends, may your day be filled with wonder and joy!
Today’s post is all about getting into the nitty-gritty of setting up a facet in Sitecore Search, smoothly weaving it into our NextJs solution, and totally owning the facet straight from our Sitecore environment. It’s going to be quite the ride!
But before we get started, have you heard the fantastic news? Sitecore Forms for XM Cloud is now available!
*I still prefer to call it Sitecore Forms, haha 🙂
In addition, Martin Miles has written a wonderful post about everything related to Forms for XM Cloud. Give it a read and let it bring some joy to your day – XM Cloud Forms Builder
First, we will develop a “range” facet within Sitecore Search, targeting the attribute field car_sales_price, which is already established in Sitecore Search. Notably, these attributes are accessible through the Domain Settings.

Lets have a look at the field:

Notice that the field is of type float (I would prefer decimal, but Sitecore Search does not support decimal), and most importantly… The Placement is set to Locale, this means we can localize it later on for the facet.
To make the field “facetable”, we will have to navigate to the “Use For Features” tab in the detail view of the field and tick the Facets checkbox.

And don’t you ever forget to publish your changes! I do it every time haha 🙂
Next part is to configure the facet and localize it. To configure the facet we will go to Domain Settings and locate Feature Configuration

Click Edit, to work with facets

Let’s have a look at the newly created Facet, which is based on the field car_sales_price.

*We will do nothing here.
Let’s close it and head back to the list of facets 🙂
The next thing to do is to customize the facet by changing its label to the right language, matching the language preferences of our website visitors. This localization process means selecting and using the right language settings for the facet label, and we’ll do this using the ‘Localization’ option.

Let’s locate the “facet field” and set a proper text, in the right language column 🙂

Save the changes and, of course, always publish 😉
Let’s try out the facet in the API explorer in Sitecore Search:

Notice the label “Pris” (Swedish for price) and of course the values.
Our work in Sitecore Search is done 🙂
We want to display a page for products with filters on our Sitecore Headless website. In NextJs, we will use Sitecore Search components.
The way we’re doing this is by letting editors choose which facets will show up on a listings page. To do this, we’ll create a rendering and a datasource. This data source will contain a list of facets, making it easy for editors to select and modify the facets that work best for each listings page.
Here is the datasource, notice the multilist of facets 🙂

And of course the value of the Facet Car Price is “car_sales_price”

Our work in Sitecore is now done 🙂
Last part is adding the price range facet to our “SitecoreSearchCarsList” component in NextJs.
The trick to getting Sitecore Search to work smoothly with Sitecore is to set up two components: SitecoreSearchCarsList and SitecoreSearchCarsListResult.
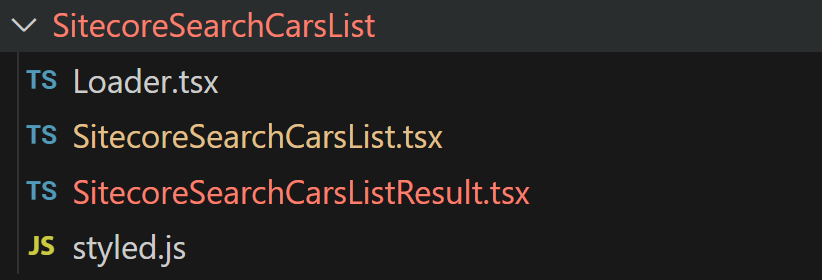
The “SitecoreSearchCarsList” component is the one we use in the Sitecore rendering, and that’s where we get all the datasource fields from.
import { Field, withDatasourceCheck } from '@sitecore-jss/sitecore-jss-nextjs';
import { ComponentProps } from 'lib/component-props';
import SitecoreSearchCarsListWidget from './SitecoreSearchCarsListResult';

type SitecoreSearchSortingType = {
  id: string;
  url: string;
  name: string;
  displayName: string;
  fields: {
    SitecoreSearchSortingName: {
      value: string;
    };
  };
};

type SitecoreSearchFacet = {
  id: string;
  url: string;
  name: string;
  displayName: string;
  fields: {
    SitecoreSearchFacetName: {
      value: string;
    };
  };
};

type SitecoreSearchCarsListProps = ComponentProps & {
  fields: {
    SitecoreSearchCarsListSource: Field<string>;
    SitecoreSearchCarsListFilter: Field<string>;
    SitecoreSearchCarsDetailPage: Field<string>;
    SitecoreSearchCarsListSortingTypes: SitecoreSearchSortingType[];
    SitecoreSearchCarsListFacets: SitecoreSearchFacet[];
  };
};

const SitecoreSearchCarsList = ({ fields }: SitecoreSearchCarsListProps) => {
  const sortTypesFromSitecore = fields.SitecoreSearchCarsListSortingTypes.map(
    (sortType) => sortType.fields.SitecoreSearchSortingName.value
  );

  const facetsFromSitecore = fields.SitecoreSearchCarsListFacets.map(
    (facet) => facet.fields.SitecoreSearchFacetName.value
  );

  return (
    <div className="container">
      <SitecoreSearchCarsListWidget
        rfkId={process.env.SEARCH_RFKID}
        defaultItemsPerPage={24}
        defaultPage={1}
        defaultSortTypes={sortTypesFromSitecore}
        defaultFacets={facetsFromSitecore}
        defaultSource={fields.SitecoreSearchCarsListSource?.value}
        defaultCarsDetailPage={fields.SitecoreSearchCarsDetailPage?.value}
      />
    </div>
  );
};

export default withDatasourceCheck()(SitecoreSearchCarsList);
Notice how we “call” the second component SitecoreSearchCarsListWidget and we populate it with Sitecore fields, like the defaultFacets={facetsFromSitecore}
Regarding the SitecoreSearchCarsListResult component, I can’t show you all the code right now, but to set up a range facet, you just need to configure it in the “useSearchResults” section.
useSearchResults<CarItem, InitialState>({
    query: (query) => {
      query.getRequest().setSearchFilter(equalFilter).setSources(indexSources);
    },
    config: {
      facets: {
        car_sales_price: { type: 'range' },
      },
    }
For the “range magic”, we will create a PriceFacet using styled component => RangeFacetStyled.
type PriceFacetProps = {
    min: number;
    max: number;
  };

  const buildRangeLabel = (min: number | undefined, max: number | undefined): string => {
    return typeof min === 'undefined'
      ? `< $${max}`
      : typeof max === 'undefined'
      ? ` > $${min}`
      : `$${min} - $${max}`;
  };

  const buildFacetLabel = (selectedFacet: any) => {
    if ('min' in selectedFacet || 'max' in selectedFacet) {
      return `${selectedFacet.facetLabel}: ${buildRangeLabel(
        selectedFacet.min,
        selectedFacet.max
      )}`;
    }
    return `${selectedFacet.facetLabel}: ${selectedFacet.valueLabel}`;
  };

  const PriceFacet = ({ min, max }: PriceFacetProps) => {
    return (
      <RangeFacetStyled.Root max={max} min={min} autoAdjustValues={true}>
        <RangeFacetStyled.Track>
          <RangeFacetStyled.Range />
        </RangeFacetStyled.Track>
        <RangeFacetStyled.Start>
          {(value) => (
            <CurrencyFormat
              locale={sitecoreContext.language}
              displayType="text"
              value={value}
            ></CurrencyFormat>
          )}
        </RangeFacetStyled.Start>
        <RangeFacetStyled.End>
          {(value) => (
            <CurrencyFormat
              locale={sitecoreContext.language}
              displayType="text"
              value={value}
            ></CurrencyFormat>
          )}
        </RangeFacetStyled.End>
      </RangeFacetStyled.Root>
    );
  };
The css for the RangeFacetStyled:
const RangeFacetRootStyled = styled(SearchResultsFacetValueRange)`
  position: relative;
  display: flex;
  align-items: center;
  user-select: none;
  touch-action: none;
  width: 100%;
  height: 20px;
  margin-bottom: ${theme.vars.spacing.l};
`;

const RangeFacetTrackStyled = styled(RangeFacet.Track)`
  background-color: ${theme.vars.palette.grey['400']};
  position: relative;
  flex-grow: 1;
  border-radius: 9999px;
  height: 3px;
`;

const RangeFacetRangeStyled = styled(RangeFacet.Range)`
  position: absolute;
  background-color: ${theme.vars.palette.primary.main};
  border-radius: 9999px;
  height: 100%;
`;

const indicatorStyles = `
  display: block;
  width: 20px;
  height: 20px;
  background-color: white;
  box-shadow: 0 2px 10px grey;
  border-radius: 10px;
  font-family: 'Raleway', 'Helvetica Neue', Verdana, Arial, sans-serif;
  font-size: 10px;
  line-height: 20px;
  text-align: center;
  cursor: pointer;

  &:hover {
    background-color: ${theme.vars.palette.primary.main};
  }

  &:focus {
    outline: none;
    box-shadow: 0 0 0 3px grey;
  }

  span {
    position: absolute;
    left: 0;
    top: 30px;
    font-size: 14px;
    font-family: 'Raleway', 'Helvetica Neue', Verdana, Arial, sans-serif;
  }

  `;

const RangeFacetStartStyled = styled(RangeFacet.Start)`
  ${indicatorStyles}
`;
const RangeFacetEndStyled = styled(RangeFacet.End)`
  ${indicatorStyles}
`;

export const RangeFacetStyled = {
  Root: RangeFacetRootStyled,
  Track: RangeFacetTrackStyled,
  Range: RangeFacetRangeStyled,
  Start: RangeFacetStartStyled,
  End: RangeFacetEndStyled,
};
Before we move on to the final step, we need to prepare the facets that were selected by the editors in Sitecore.
// Filter and sort facets based on defaultFacets
const filteredSortedFacets = useMemo(() => {
if (!defaultFacets || defaultFacets.length === 0) {
  return []; // Return an empty array or some default facets if needed
}
const facetOrderMap = new Map(defaultFacets.map((name, index) => [name, index]));
return facets
  .filter((facet) => defaultFacets.includes(facet.name))
  .sort((a, b) => {
	const aOrder = facetOrderMap.get(a.name);
	const bOrder = facetOrderMap.get(b.name);
	return aOrder - bOrder;
  });
}, [facets, defaultFacets]);
Here’s the final part 🙂 We’ll use filteredSortedFacets to list the facets. Just a heads up, we’re currently checking for the specific facet, but there might be a better way to do this 🙂 Anyway, if it’s not the price range facet, we’ll display the facets with checkboxes.
{filteredSortedFacets.map((facet) =>
  facet.name !== 'car_sales_price' ? (
	<AccordionFacetsStyled.Facet facetId={facet.name} key={facet.name}>
	  <AccordionFacetsStyled.Header>
		<AccordionFacetsStyled.Trigger>{facet.label}</AccordionFacetsStyled.Trigger>
	  </AccordionFacetsStyled.Header>
	  <AccordionFacets.Content>
		<AccordionFacetsStyled.ValueList>
		  {facet.value.map((facetValue, index) => (
			<AccordionFacetsStyled.Item
			  {...{ index, facetValueId: facetValue.id }}
			  key={facetValue.id}
			>
			  <AccordionFacetsStyled.ItemCheckbox>
				<AccordionFacetsStyled.ItemCheckboxIndicator>
				  <CheckIcon />
				</AccordionFacetsStyled.ItemCheckboxIndicator>
			  </AccordionFacetsStyled.ItemCheckbox>
			  <AccordionFacetsStyled.ItemCheckboxLabel>
				{facetValue.text} {facetValue.count && `(${facetValue.count})`}
			  </AccordionFacetsStyled.ItemCheckboxLabel>
			</AccordionFacetsStyled.Item>
		  ))}
		</AccordionFacetsStyled.ValueList>
	  </AccordionFacets.Content>
	</AccordionFacetsStyled.Facet>
  ) : (
	<AccordionFacetsStyled.Facet facetId={facet.name} key={facet.name}>
	  <AccordionFacetsStyled.Header>
		<AccordionFacetsStyled.Trigger>{facet.label}</AccordionFacetsStyled.Trigger>
	  </AccordionFacetsStyled.Header>
	  <AccordionFacets.Content>
		{
		  <PriceFacet
			min={Math.floor(facet.value[0].min)}
			max={Math.floor(facet.value[facet.value.length - 1].max)}
		  />
		}
	  </AccordionFacets.Content>
	</AccordionFacetsStyled.Facet>
  )
)}
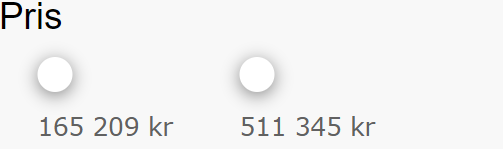
Notice how we’ve set the PriceFacet with minimum and maximum values.
Here is the end result 🎉😀
I want to say again how much I like Sitecore Search. It works so well with both Sitecore XM Cloud and Sitecore XP. It’s easy to use and really effective, which makes it great to work with!
That’s all for now folks 🙂
